
White Russian Cupcakes!!!


How delicious do these look?!?!
Oh yeah store them in an air-tight container for up to 5 or 6 days...maybe a week. But I doubt they'll last that long really.

Alright, so the story behind these cupcakes...I was on Pinterest and I kept seeing this post about these White Russian Cupcakes. Cupcakes with alcohol in them?! Oh my god, yes! Since discovering these one I've found a whole lot of different cupcakes based off of drinks! My "cupcakes to-make" list grew exponentially after this day. So I clicked on the Pin and it took me to this fabulous blog. This girl's blog, Baked Perfection, is awesome. She's got a major sweet tooth and has quite the talent for baking. She's pretty inventive too. So I emailed her asking if I could post her White Russian Cupcakes to my blog and she graciously agreed. Of course I'm giving her credit. I wish I had thought these up on my own...maybe one day...
The Kahlua Buttercream frosting for these is to die for. I could probably make some right now and just eat the frosting. So good. So, so, so, so, so good. The taste of vodka and Kahlua in the cupcake itself isn't super strong either, which is wonderful. There is still a sweet, light, cupcake taste with just a hint of the booze. I used a piping bag for the frosting for the first time with these too...Took a few tries but I got the hang of it by cupcake #4.
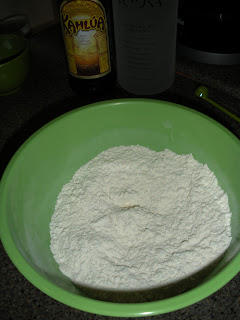
Shall we get started? Grab some bowls and get ready to have a blast making these!! Here's what you'll need!

1-1/4 cups all purpose flour (I added an extra 1/4 cup at the end before baking)
1-1/2 teaspoons baking powder
1/4 teaspoon salt
3/4 cup sugar
6 Tablespoons butter, softened
1 large egg AND 1 egg white
1 teaspoon vanilla extract
1/2 cup milk
1/8 cup vodka
2/8 cup of Kahlua, divided into 1/8 amounts

First...preheat your oven to 350 degrees Fahrenheit.
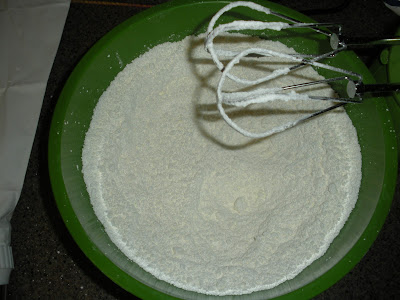
Grab a medium sized bowl and mix together the flour, baking powder, and salt. Set that aside for a few minutes.

In a different bowl cream the butter and sugar until they are light and fluffy. Once that's done, add in the egg and egg white one at a time. First at the egg in to the butter/sugar creamed mixture with a hand mixer or in a stand mixer. Then add in the egg white, again mix well.

Once that's all mixed in, time to add in the fun stuff! Grab the vanilla, vodka, and 1/8 of a cup of Kahlua!

Throw those into the creamed mixture and again, beat until well combined.

Now it's time to do that alternating thing between adding in the dry flour mix and the 1/2 cup of milk into the creamed mixture.I started with the dry mix, added in about 1/3 of the mix and then beat it to mix the flour in. Then I added about 1/4 cup of milk, again beat it until mixed in...repeat until both the flour mix and milk are well blended into the batter.
Now you're probably sitting there going, "this looks pretty thin to be a good cupcake batter." Or at least I was, it is pretty thin, so I added an extra 1/4 cup of flour here. But there you go, cupcake batter is all done. Pour batter into paper-lined muffin cups!

I used fancy liners this time instead of plain white ones...probably because of the picture on Baked Perfection's blog. She used black and white liners and I liked how it looked. You can use whatever color you want...anyways...
Bake the cupcakes for 17-20 minutes, depending on your oven of course! I put mine in for 10 minutes then turned the pan around because I have a slight hot-spot in my oven then baked for another 10.

Ooooooo look how good those look! I really want some of these now...hrmmm maybe later...
Once they're done baking, you'll know they're done when a toothpick/cake tester inserted near the center of the cupcake comes out clean.

Now, remember that extra 1/8 cup of Kahlua? Is that handy? It better be. What I did was poke a few holes into the top of each cupcake and then brushed the remaining Kahlua over top each cupcake. It gives the cupcake a really nice browned look. Also, it helps keep the cupcakes really moist.

Once the Kahlua has been brushed over the cupcakes, remove them from the pan and cool on a wire rack. These need to be completely cool before you can frost them...They might look good enough to eat right now, but trust me you'll want to wait for that frosting. Speaking of...here's what you'll need!
1/2 cup butter (1 stick), softened
3 cups powdered sugar
a pinch of salt
4 Tablespoons Kahlua

First, beat that butter until it's nice and creamy!
The butter needs to be pretty soft for you to get the right consistency for the frosting, but not so soft it's almost melted. Play the "just right" game with it.
Add in the salt and the 1st cup of powdered sugar next...then keep adding in the powdered sugar about 2/3 a cup at a time. Mix it on a slow speed so the sugar doesn't go everywhere!!

It's going to look pretty crumbly and not like frosting at all. Don't worry, that's how it's supposed to be. Now is when you start to add in the Kahlua, one Tablespoon at a time. It's going to remain pretty crumbly through the first two tablespoons of Kahlua. For me, even after I added in the third tablespoon, my frosting still looked like this...

Crumbly, crumbly, crumbly! Ahhh I was beginning to doubt the liquid content. Could 1 more tablespoon really make this crumbled mess into a delicious frosting? Oh yes it could. I added in the 4th tablespoon of Kahlua and BOOM!

Frosting!!

Amazing isn't it? I think it is. OK so now grab a pastry bag and a large frosting tip. I used my M1 Wilton frosting tip to go along with my brand new featherweight pastry bag.
If you don't have a pastry bag, reinforce one of the corners of a gallon sized Ziploc bag with a few layers of scotch tape and then cut the tip of the corner off of the bag. Use a coupler with the frosting tip too. I used a coupler with my pastry bag too. There's a way you can cut off the tip of the Ziploc bag so you don't have to use the frosting tip...but I have no idea how to do that.
If you don't have a frosting tip I'm sure just the simple hole in the corner of the bag will work, the frosting design won't have the same look, but it will act the same as if I had used a round tip.
Are your cupcakes cool? Is your frosting in your pastry or Ziploc bag? Need help getting that frosting into the bag? Put the bag in a cup and fold the top over the sides of it. It will make it so you can use both of your hands to scoop the frosting out of the bowl instead of trying to scoop/hold the bowl with one hand and hold the pastry bag in the other.

Now comes the fun part! Frosting!! Don't worry if the first couple cupcakes don't turn out fantastic. Mine sure didn't...
Yeah, not to pretty eh? It's OK you can either scrape the frosting off and try again or leave it to see your progress.
The key with getting the frosting to come out nicely is to hold the bag where the frosting fills up the bag to, and create a sort of seal with that hand. With the other hand, place it near the bottom right by the frosting tip and twist both hands sort of like how you wring out a wash cloth. Use the bottom hand to guide the frosting onto the cupcake. Simply squeezing the bag doesn't quite work out. Well, it does but you tell me, how does that cupcake look? Crappy. That's how. Once I figured out the twisting technique, which took some help from Google, this is now my cupcakes started to look. My description may not be the easiest to understand. YouTube and Google saved me here.

Looks much better doesn't it? I've been continuing to work on my cupcake decorating skills since I made these last month...or was in it January...I don't remember now. I want to make them again though, they are delicious.
So like I said, don't get frustrated if you can't get the hang of it right away. Do what I did, go on Google and look up different frosting techniques and find the one that works for you!
I did start from the outside and worked my way into the center of the cupcake. That worked best for me.

So there you go! White Russian Cupcakes!
Hope you have fun with these and with the fun part of figuring out how to frost a damn cupcake nicely!
Well I'll leave you with a couple more pictures!
Well I hope you enjoy these as much as I did...do. :)

How delicious do these look?!?!
Oh yeah store them in an air-tight container for up to 5 or 6 days...maybe a week. But I doubt they'll last that long really.

Thanks again for stopping by!!
'Til Next Time!!
No comments:
Post a Comment