Sunday, July 6, 2014

Skillet Beef Tamales


Skillet Beef Tamales Tacos!

Skillet Beef Tamales, super easy to make and super quick. Toss in some crushed Tortilla chips or hard taco shells, add some sour cream maybe some chives and you're golden. Don't want to eat it out of a bowl? Wrap this up in a tortilla! Pick your level of salsa spiciness too to suit your tastes, you'll be glad you have this one on hand!

OK. Honestly, not sure why this one is called Tamales...doesn't seem like the traditional Tamale to me. I would say Skillet Beef Tacos if anything...so that's What I'm calling it now! This one is very straight forward, if you want something delicious, but don't want a thousand dished to do at the end, this is your recipe. It also works if you're somewhat "bored" of the regular tacos. Let's get started here's what you'll need!


1 pound ground beef
1 chopped green pepper
1 chopped red, yellow, or orange bell pepper
2 cups of Salsa (spicy level of your choice)
3/4 cup frozen corn
2 tablespoons of water
Cheddar Cheese
Tortilla Chips or hard shells...of soft tortillas
Sour Cream

Grab a decent sized skillet and that's pretty much all you'll need for this one.


First thing you're going to do is chop up your bell peppers. This time I chose Green and Yellow. Red or Orange also work so really just depends on your grocery store and which peppers look the best. Do that, set it aside for a few minutes while you get the ground beef going.


Of course, brown the ground beef. Cook it on a medium heat until there isn't any pink left. I added a bit of Onion Powder and Garlic powder to season the ground beef a bit. Adding extra seasonings can't hurt, right?

I mean hell, throw a bit of wine or beer in there too! I wouldn't say no to a little black pepper...salt...chili powder...

Once the beef is looking a bit more like the picture up there. Toss in the peppers and cook for a few more minutes until the beef is completely cooked. Drain some of the excess juices if there's a lot.

Next, grab that corn and salsa!
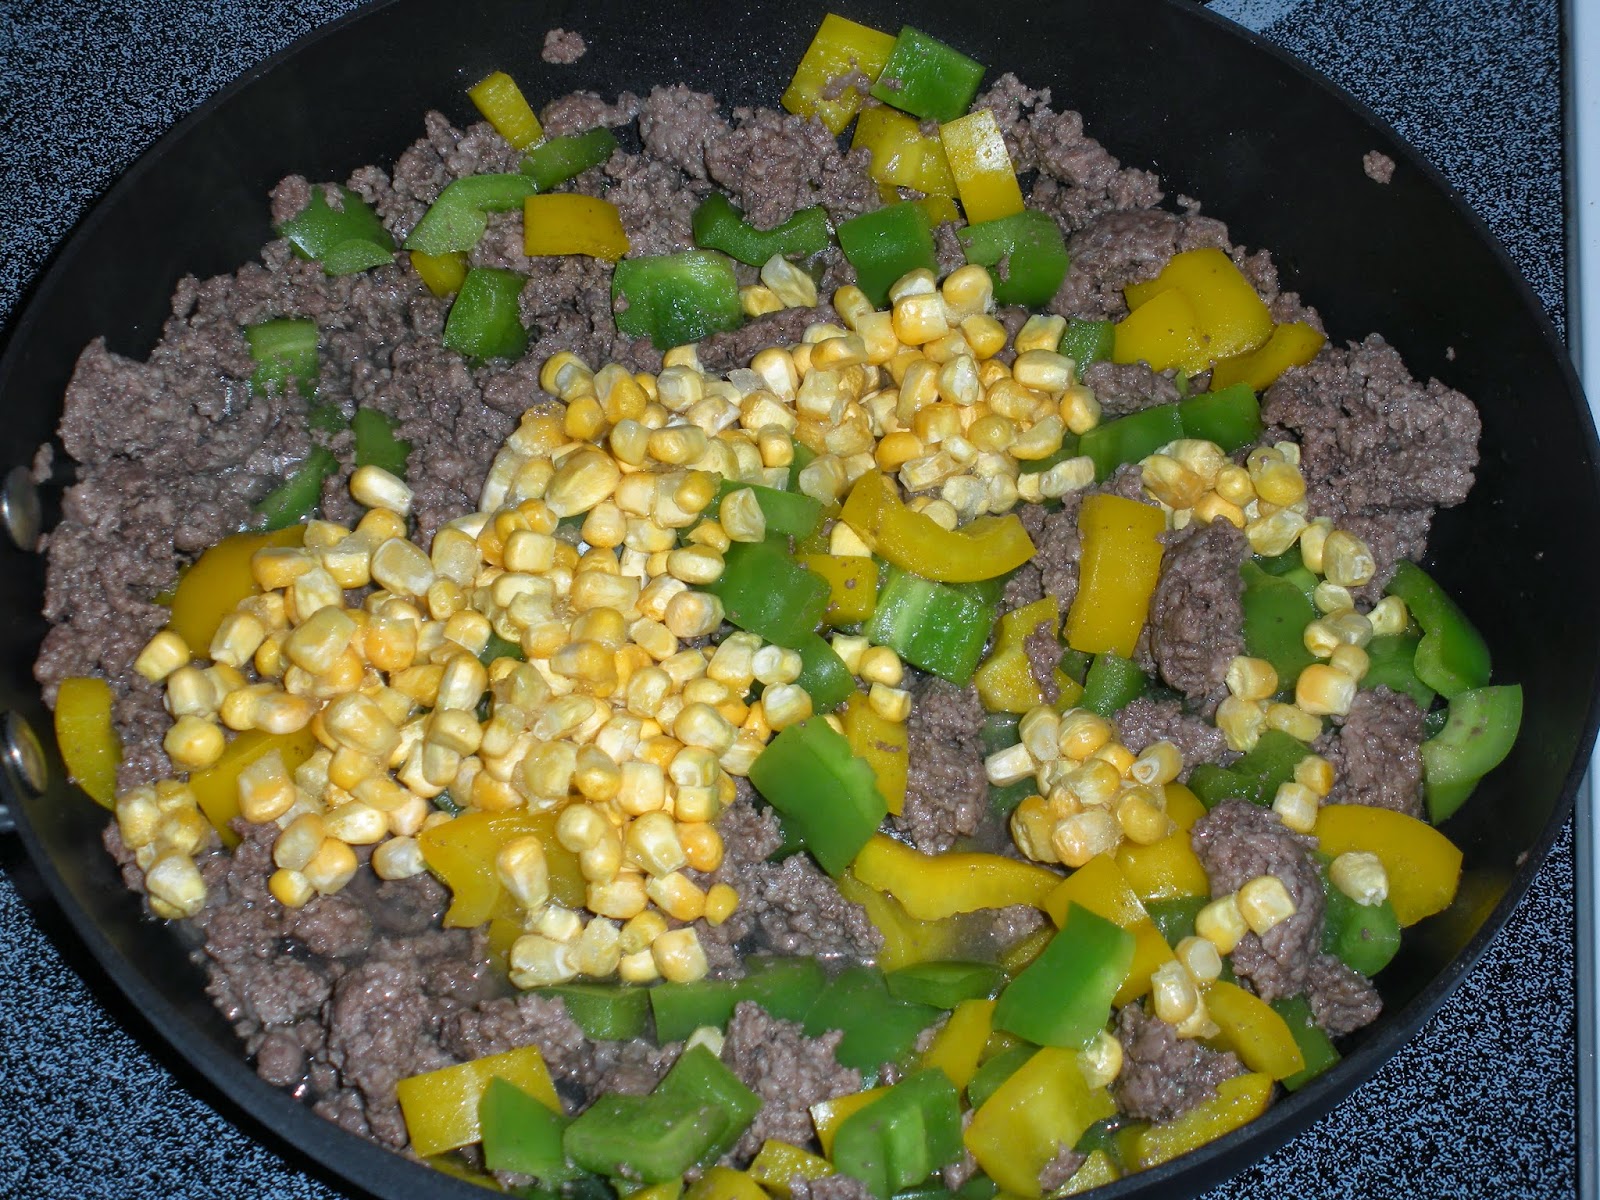


Corn...nothing much to say here just toss that in and then grab your salsa.


This was the Salsa of choice that night. Actually is was pretty damn delicious, I strongly recommend this salsa.

As I've said before, use the salsa with the spice-level of your choice. I love spicy food so I went for the hot salsa. If you're not big on spice go for mild, if you're not sure....medium. Just remember you can always make something more spicy; you can't...un-spice something.


Bring the beef, salsa, deliciousness to a boil, which will take only a few minutes. Now comes the hard part...once it's boiled for a couple of minutes, reduce the heat to a simmer and cover it. Now walk away for about 15 minutes.

15 minutes later....

Looks pretty good doesn't it? Alright now you can sprinkle that with the Cheddar Cheese, or you can do what I do and create a wonderful cheese layer. Why? Because I freaken love cheese, that's why. Cover it back up and cook for a couple minutes longer so the cheese can melt. Now dish it out into bowls, crush up some hard shell tortillas, chips...or roll these bad boys up in flour tortillas. Serve with some Sour Cream, Guacamole, more salsa if you want. Anything really it's up to you.


All in all, this probably took you about 30 minutes to prep and make. It's perfect for a weeknight when you don't want to be spending an hour or more in the kitchen.


As always, thanks for stopping by my blog. Really appreciate the views and any comments, questions, or suggestions you might have!


Til Next Time!!

Sunday, June 22, 2014

Creamy Spinach and Artichoke Dip!!!


Creamy Spinach and Artichoke Dip
(somewhat of a clone of Red Robin's dip)

Sunday's need to return to the day that I actually write in my blog. It's been almost a year and so much has changed. I moved into a new place, got promoted at my job, my boyfriend and I adopted/rescued a 2 year old Doberman named Luke to add to our crazy household (yes, we decided dogs are better than kids). And in general I have taken major strides in my adulthood. I bought a new truck the other week so now I REALLY feel like I'm an official adult. That being said I figured it was my responsibility to continue my blog. I've missed it, I feel like writing every week and pushing myself to create new things in the kitchen. I feel like I haven't been quite as creative as I could be.

Now who doesn't love a good spin-dip? If you don't well, I guess this entry might not be for you, luckily there's a few other entries on this blog you might be interested in! Shall we get started with this yummy dip? Here's what you'll need!

10-oz box of Frozen Chopped Spinach
1 cup artichoke hearts (canned works just fine)
1/4 cup diced white onion
8 oz softened cream cheese
1/2 cup shredded Parmesan cheese
3/4 cup half-and-half cream
about 1/2 teaspoon garlic powder
1/2 teaspoon salt
Bacon Bits or Crumbled Bacon strips, really as much as you want!!

It's fairly straight forward. Drain the spinach and get a lot of the excess water. You can chop up the Artichoke hearts into some friendly bite-sized pieces. Throw those along with the white onion in a microwave safe bowl and cover it with plastic wrap. Cut a slit so some steam can escape and pop that in the microwave for about 4 minutes.


While you have that in the microwave for those 4 minutes go a head and grab some of the other ingredients to get the cheese sauce part of the recipe going!


Take the Parmesan cheese, half-and-half cream, and the softened cream cheese put them in a medium sized sauce pan. Heat that on a medium/medium-low heat and stir pretty consistently to get the cream cheese and Parmesan cheese to melt and combine with the cream.


Once those ingredients start to melt and combine add in the garlic powder and salt.

Reduce the heat to a low setting once the sauce is smooth and add in the steamed veggies (spinach, artichokes, and white onion). Cook that for about 10 minutes, again stirring occasionally.


The smell might make you want to just start eating it right out of the pan. Trust me I know I did! But hold off for a few minutes and add in those bacon bits and possibly a little extra Parmesan cheese!!


Stir it up again and get your serving bowl ready along with either Tortilla chips or Pita chips, Pita bread, fresh veggies anything you would like!!


Yup, it's pretty delicious looking!


Ta-da!!! The finished product.

Eat it up, share it with your friends, roommates, what ever you decide!


Thanks for stopping by and I'll be working on concocting some new recipes in the coming weeks! I gotta get my creative juices flowing again in this ridiculous Arizona summer heat!!

Most of my cooking will most likely be accompanied by a cocktail or two to help keep me cool!


Til Next Time!!

Sunday, August 4, 2013

Dill Veggie Dip


Dilly of a Veggie Dip

I have this obsession with Dill Weed and veggie dips...actually I think most of my obsession is carrots. I love carrots. I have seriously been eating them non-stop for the past month or so. I can easily sit there and eat a whole bag of carrots, especially if I have dip.

So this dip is insanely easy and freaken fantastically good. You just need about 5 ingredients and a bowl.

1 cup cottage cheese
1 cup Mayo
1-1/2 teaspoons seasoned salt
1-1/2 teaspoons dill weed
1-1/2 teaspoons parsley


Now take the cup of cottage cheese and mash it so there aren't any huge lumps in it. I just press the back side of a spoon all around the cheese for a few minutes. If you like lumps of cottage cheese then really you can skip this step I guess...

Add in the mayo and stir it up. Personally I do not like Mayo at all. Except when it's mixed in with stuff. Like this, but even still I try not to think about the amount of Mayo used.


Next up! Grab your spices. I usually add in a bit more dill than 1-1/2 teaspoons. Why? Because I love dill weed.

Ahh I just discovered the most amazing spice store out here in Phoenix. Literally my new spice heaven. It took all the self-control I had last week to not buy one of 95% of the spices in the store. It's called Penzy's I suggest you look it up or go there or something. So many spices and they all smell SO good!!

Anyways...


Spices, in the bowl with the cottage cheese and mayo. Now just stir it all up and taste test. Need more dill? Parsley? Seasoned salted? Add it in!!


Alrighty, does it taste good? Excellent! Now cover it up and chill it for at least 1 hour to let the flavors sink in.

So that was simple...last week I made, well my boyfriend and I made, homemade burgers with homemade onion rings. The onion rings were buttermilk and sour cream batter with green onion and other spices. Topped with a Spicy Ranch Aoli. Oh my god. Best onion rings I've ever had. I love onion rings... I think I really just love food.


Well there you go! Pretty sure this veggie dip came from someone in my family...
Hmmm I wonder what it would be like with a bit of diced onion in there?
Ideas, ideas...
Well thanks for stopping by and I hope you enjoy this super simple dip!!

'Til Next Time!!

Saturday, July 13, 2013

Pineapple Upside-Down Muffins!


Pineapple Upside-Down Muffins!


It's like individual servings of a cake...that are muffins so you can eat them for breakfast and not feel guilty.


Don't worry I'm in the process of making individual sized Pineapple Upside-Down Cakes too...at some point


Now, I've made these little gems a few times. Each time I think they get better and better. My secret? Add way more pineapple than what the original recipe calls for. I love pineapple, love, love, love, love it!! I could put pineapple on almost anything. Yeah...almost anything, there are some things where pineapple doesn't belong. OK so within reason I'll put pineapple on anything. 

As I've said before, muffins are almost always really easy to make. Remember my muffin kick in October? I know I do! Muffin recipes are always straight forward, the main thing to concern yourself with muffins is not over mixing the batter. Over mixing the batter just leads to dense, hard muffins. Not as tasty as light and fluffy ones. Right? OK so why don't we get started here.

Here's what you'll need:

1/4 cup melted butter
1/3 cup brown sugar
2  8 oz cans of crushed pineapple, WELL drained!
1-3/4 cups all-purpose flour
1/2 cup sugar
1/4 teaspoon salt
1/2 teaspoon baking soda
1 teaspoon baking powder
1 teaspoon cinnamon
2 eggs
1 cup buttermilk
2 Tablespoons melted butter

Seems like a lot for muffins, but trust me it's totally worth it! First thing you're gonna do is very lightly great a muffin tray. Then preheat your oven to 375 degrees Fahrenheit.


Grab your 1/4 cup melted butter and spoon evenly into the muffin cups.


Sprinkle the 1/3 cup of brown sugar over top of the melted butter.


Spoon the insanely well drained pineapple over the brown sugar and melted butter. Ahh the yummy-nes is starting already.

Set that aside for a few minutes and grab a large mixing bowl.


In that large bowl combine the flour, sugar, salt, baking powder, baking soda, and cinnamon. Mix is all up so it's well blended. Then set it aside.

In another bowl whisk together the 2 eggs, buttermilk, and 2 Tablespoon melted butter. Whisk them until they are well combine and the mixture is smooth.

Create a well in the dry mix and add in the liquid.


Remember, do not over mix. Just stir it until the dry mix is moistened and evenly blended with the liquid.

I really can't stress the importance of not over mixing batters enough. Trust me, it took me a good long while to get the hang of it and now I can easily tell when something has been mixed enough, not enough, or overdone. I've been through enough hard muffins, cupcakes, brownies, etc. to know.

Your oven should be either pre-heated by now or pretty close to it. So go ahead and spoon the batter into the muffin cups, over the pineapple.


Alright, so here's the fun part. The first time I made these the batter wasn't completely even and level in the cups. So when I baked them, some of them came out lop-sided and crooked. They tasted all the same, but for presentation purposes try to get the batter as level as possible in the muffin cups before popping them in the oven. They won't be perfect, or maybe they will, I personally have not yet mastered the perfectly level upside-down muffin yet. It might depend on your oven too, mine has a couple hot-spots and such.


Anyways, once you've got your glorious muffin batter perfectly (or as close to it) even and level in the tins. Pop them in the oven for 20-25 minutes. I usually put mine in for 15 minutes, then switch the pan around for the last 5-6. 

See they're rising nicely and they are for the most part, even! Woohoo! Success!! Alright, now close the damn oven you're letting all the heat out!


When the muffins are done, let them cool for about 10-12 minutes. You can't let them cool too long in the pan they might get stuck. On the other hand if you take them out too early they could fall apart. So here's what I usually do and it works about 75% of the time...

I take a couple of paper towels and put them over the muffins. The pan should be cool enough to touch, or just wear oven mitts, hold the paper towels in place and flip the pan over. The muffins should easily come out of the tins and just end up on the paper towels. Once I did this, the paper towels slipped and I had muffins all over the floor. Needless to say, my dog was happy. I was not.


Now just transfer them to a cooling rack. Store them in an air tight container on the counter for a few days or in the fridge for up to 1 week.

I like to eat mine slightly warm so I'll pop them in the microwave for maybe 10 seconds. These would be awesome served with ice cream and a little caramel sauce, I think. If you do it, let me know how it is...

Well there you go! Pretty easy right? Clean up shouldn't be too bad with these either!


Questions? Comment? Concerns? Anything at all?
Leave me a comment and I'll respond!
Hope you enjoy these!!
'Til Next Time!!

Thursday, July 4, 2013

What's on the Menu? Roasted Red Pepper Sauce!


Roasted Red Pepper Sauce 
with Pork Kielbasa and 4-Cheese Raviolis

I know I said I was going to be better at posting...3 weeks ago...I swear I need to get myself on a schedule. The only reason I'm posting now is because it's the fourth of July and I don't have work today! Woohoo! Nothing like still waking up at 8am...ok better 8am than 5:45am like I normally do. So technically I did sleep in. Happy 4th everyone! I'm sitting here, with my coffee basking in the glory of not being at work today. Actually, I still love my job, but any day off is a fantastic day. I get to spike my coffee today too! I can't do that at work...

So about this Roasted Red Pepper sauce, I'm actually quite proud of it. I originally was just going to make an Alfredo sauce and toss in some finely chopped roasted red peppers. Then I thought, "naw, Kendra you can do better than that."


I started this whole thing off because I had a jar of roasted red peppers in my pantry...I really wanted to make a pasta sauce...this is what it lead too. Well that and half a bottle of wine. Trust me, the wine enhances my food making creativity!

Shall we get started? I think, yes!!


Here's what you'll need: (These amount make enough for about 3-4 generous servings or 5-6 smaller not so generous servings)

1/3 of a LARGE red onion, or about 1/2 of a medium one, chopped
3 Roasted Red Peppers, pureed
2 garlic gloves, minced/crushed
some olive oil
8 oz Tomato sauce
1 Tablespoon butter
3/4 teaspoon Basil
3/4 teaspoon Italian Seasoning
1 teaspoon Black pepper
1/2 teaspoon salt
1/4 cup white wine OR water
about 3/4 cup heavy cream
1 lb pork Kielbasa sausage, chopped into bite-sized pieces
1 package 4-cheese raviolis

**disclaimer, those amounts for...Basil, Italian Seasoning, Pepper, Salt, heavy cream, wine, butter...kinda of estimates I don't really measure when I'm creating I guess how much I need to make it taste good. I've said this before, start out with small amounts then add. MUCH MUCH MUCH easier to add than to take away!!


First thing you're going to want to do is prep everything. Chop the onion, crush the garlic, puree the roasted red peppers. If you don't you'll quite possibly be running around like a mad scientist in your kitchen. I say mad scientist in the kitchen because it creates a better picture than a chicken with it's head cut off. I'm going to say if the chicken is in your kitchen, it's head is already going to be off and then it's expected. The mad scientist? No that's not expected at all.

Everything all prepped and ready to go? Great! Now let's really get started!!


Take a very large skillet or chef's pan, I used my 12 in Scanpan Pro IQ chef's pan for the sauce, I wanted to make sure I'd have enough room for the sauce, and the Kielbasa once I got to that point.


Anyways, take your chopped onion and crushed garlic and saute it over a medium heat in about 1 Tablespoon of olive oil, give or take. Let the pan heat up for a couple of minutes before tossing in the oil, onion, and garlic. Once it's in there saute for about 5 minutes.


Next up, add in the Tomato sauce, pureed Roasted Red Peppers and the 4 seasonings I listed above. Again start with small amounts of the seasonings, maybe 1/4-1/2 teaspoon of each. Then add more as you taste and go along. Stir this around every couple of minutes for about 10 minutes. During that 10 minutes you can add in the bit of water or wine, as well as that 1 Tablespoon of butter.


While that's going on, chop up your Kielbasa and get it going in another skillet over a medium heat. Add in a bit of wine or oil to keep the pieces from sticking. You're going to cook these until they're heated through and have got a bit of a crispy edge to them on the outside.


The Kielbasa is cooking, so now would be a good time to start to get your water boiling for the raviolis. Got that? Good! Now, grab about 1/2 cup of heavy cream and pour it into the sauce. This will get it to be that nice lighter color. Let it simmer still at that medium heat for about 5 minutes. Then lower the heat and taste it. Does it taste good? Do you need more spices? If so, add some. Also, add in another 1/4 cup of heavy cream after about 10 minutes. Then you just let it simmer at that low heat until everything else is ready.


Once the Kielbasa is done, toss it in with the sauce! Ahhh it looks so good!!! Coat the Kielbasa with the sauce and continue to let it simmer at that low heat. Your water should be boiling sometime soon for the Raviolis. 


Cook those according to package directions and keep tasting your sauce, if it needs anything else go ahead and add it in. More cream? More wine? More spices? Use your best judgement and adjust it to your taste preferences!! Once the ravioli's are done, drain the pasta and transfer them to either a serving dish or directly to a bowl!


How I served mine was to put some Raviolis in a pasta bowl, top it with a generous amount of sauce, then sprinkled some Romano cheese on top. Delicious? Why yes, it was. Here's some other pictures to leave your with. Hope you enjoyed this one!!


Thanks for stopping by! And have a safe and happy 4th!!!
'Til Next Time!!

***Update Feb 2014! If you don't want to use Kielbasa, use some spicy Italian sausage, or which ever type of sausage/meat/protein you'd like!! I made this for my cousins and sister last month and I used some really delicious sausage instead of the Kielbasa, it was awesome!!