Sunday, January 27, 2013

Tasty Little Treats Cinnamon-Sugar Minis


Cinnamon-Sugar Mini Muffins


These bite-sized muffins are light and fluffy with a delicious coating of cinnamon sugar.


These little muffins are delicious and super easy to make. They require ingredients that you probably already have in your kitchen so that saves a trip to the grocery store, which is always a bonus in my mind. Not that I don't like going to the store, just well I'd rather the food and ingredients magically appear in my pantry, fridge or freezer. So I was sitting around today reading probably the 7th book in 3 weeks, taking a break from my computer and browsing Pinterest to find some new ideas, and I remembered I had this recipe tucked away in one of my Taste of Home cookbooks. I knew I already had everything to make them. So I grabbed my butter from my fridge and set it out to soften before going back to my book to pass the time until the butter was ready.

It's been raining all weekend here in Phoenix, which I love, so really I've been wanting to make soup. I found a delicious looking recipe for chicken and dumpling soup...yeah I don't have all the ingredients so that didn't happen. But muffins, muffins happened. Not quite the same, maybe I'll get my butt to the grocery store tomorrow after work and get the stuff for some soup...or brownies...or cupcakes. Ahhh I need people to come eat all the goodies I make so I don't eat them all myself!

Let's get started, here's what you need.

5 Tablespoons butter softened
1/2 cup sugar
1 egg
1/2 cup milk
1-1/2 cups all-purpose flour
2-1/4 teaspoons baking powder
1/4 teaspoon salt
1/4 teaspoon ground nutmeg (I used a little closer to half...probably about 3/8 of a teaspoon)
Melted butter
Cinnamon-sugar


Fairly simple ingredients right? I've been getting in the habit of getting everything together before I start making the batter. It's much easier doing this than running back and forth in the kitchen to get the flour, then the sugar, then the salt, then the egg...etc. etc. Yep this way it's all laid out, pre-measured, and ready to go. Yup took me a while to realize this was easier. I'm so smart sometimes...

Preheat your oven to 350 degrees F.


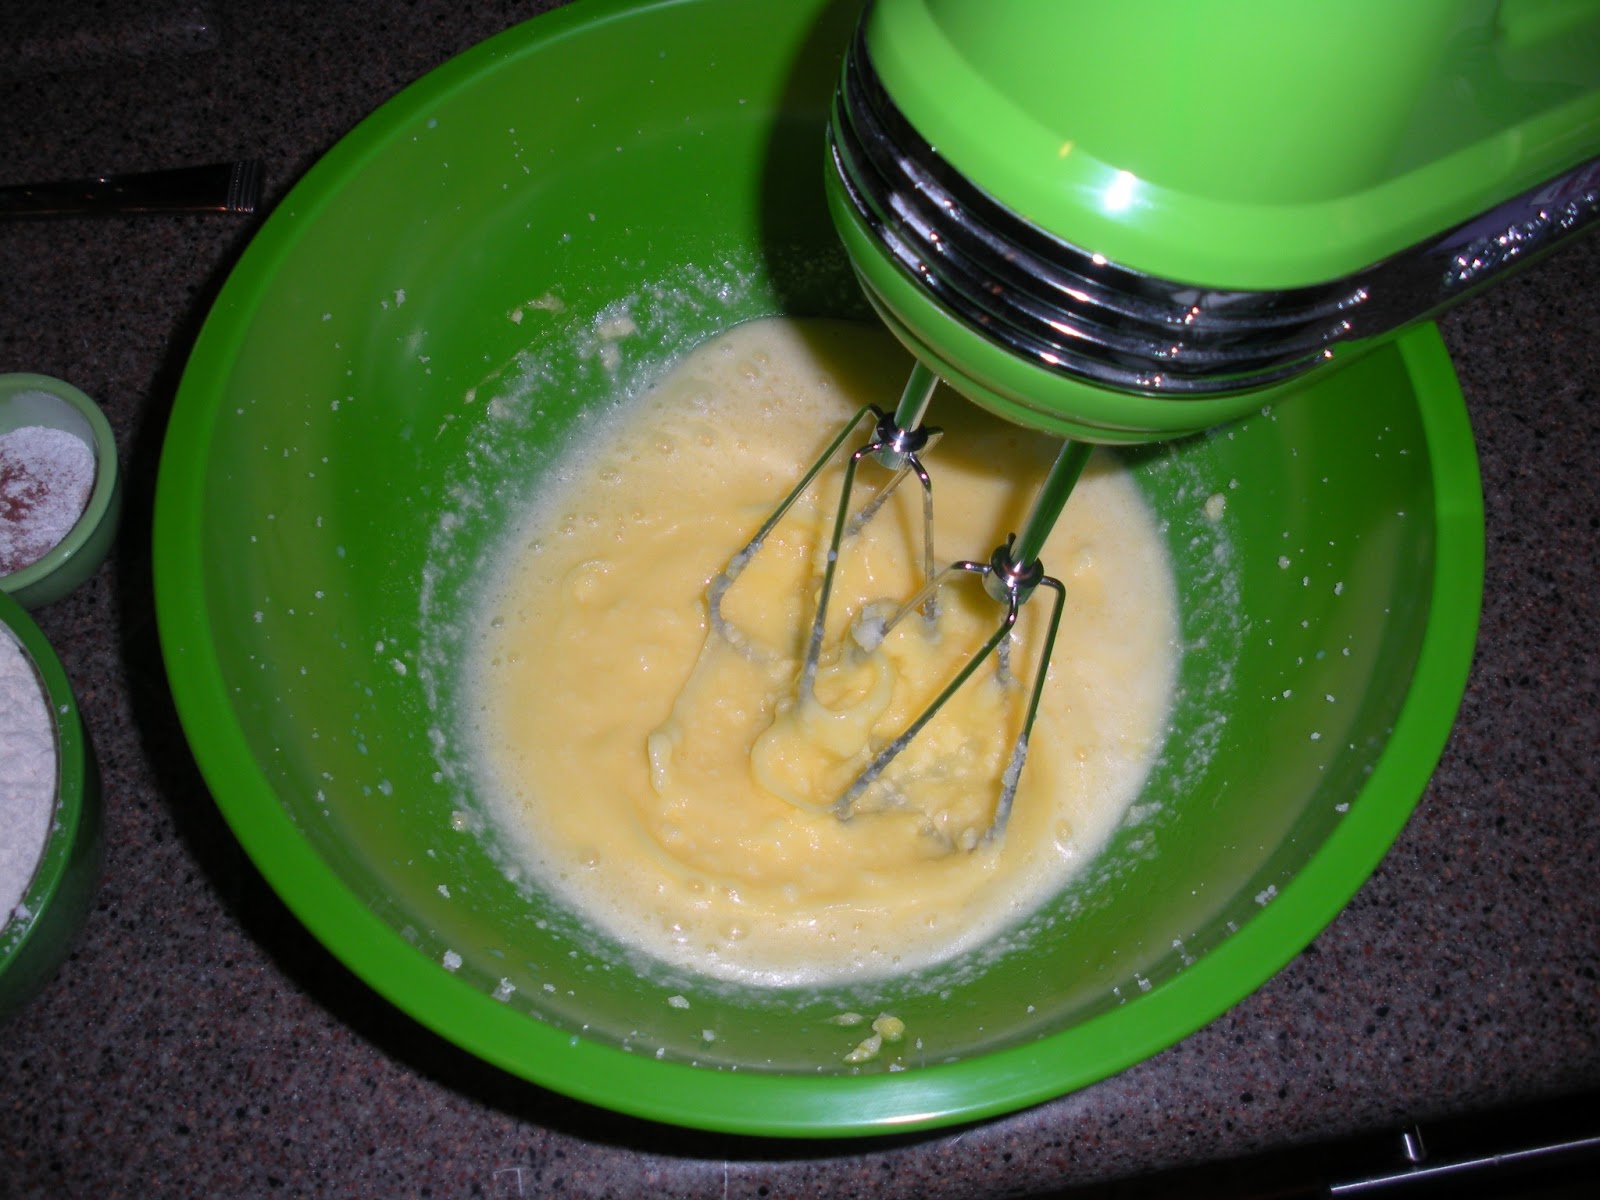
First things first, in a large mixing bowl cream the butter and sugar until it's light and fluffy.


Then beat in the egg...


And now the milk...


First time I made these I completely botched the batter the first time around. I read 1-1/2 cups of milk instead of 1/2 a cup. Started to add in the flour and realized it. Too late to do anything but trash what I had and start all over. This is why I now read and re-read a recipe probably 5 times before I start...even then sometimes I still mess up and have to start over. I think I did that with my Wasabi Beef Fajitas. Mistakes happen, just gotta roll with them and remind yourself to read carefully next time. Anyways...


Take the flour, baking powder, salt, and nutmeg and mix it all together. Then add it into the liquid mixture. I added about 2/3 of the flour combo in and used my hand mixer to get it all mixed in. Then I added the remaining third and mixed it by hand so I wouldn't over-mix the batter. Didn't want to end up with too-tough muffins. I also added a smidgen of extra milk because my batter felt just a tab bit too thick.


Line a mini-muffin tray with paper liners, or you don't have to if you don't want to. I've started lining mine muffin and mini-muffin trays because that was I don't have to worry about my muffins/cupcakes sticking even though I have really good non-stick bakeware.


Now you're going to fill the muffin cups about two-thirds full. The batter will be really thick so it might be a little difficult to spoon into the muffin cups. I just used a spoon and tried my best to make the muffin cups evenly full. If anyone has a better method for scooping muffin batter into the trays, please let me know. I keep trying different things and they work...sometimes depending on the thickness of the batter.


Bake the muffins for about 14-16 minutes. Mine baked perfectly in 14 minutes so I suggest baking them for 10 then judging how much longer they need in the oven. Everyone's oven runs different so watch your muffins carefully! They're done when a toothpick or cake tester inserted in the center comes out clean and the muffins are just slightly browned.

Let them cool in the muffin tray for about 5 minutes before transferring them to wire rack to cool. While that's going on melt some butter in a small bowl and get some cinnamon-sugar in another small bowl.


Now take the muffins one at a time...duh...and dip the top part into the melted butter, like so...


Then immediately roll the butter coated muffin in the cinnamon-sugar. Repeat with all the muffins!


See the difference between the cinnamon-sugar coated muffins and the non-coated ones? That wonderful sugared look makes these little muffins look absolutely delectable!!


These muffins are best eaten warm. If you're not going to serve them or devour them all right when you're done baking them that's OK too. They're still awesome when they're not warm, but if you want to heat them up after they've cooled or maybe the next day, just put them in the microwave for about 7-10 seconds. That's all you need with these little guys. That's 7-10 seconds if you're only heating up 2. Probably need more time if you're heating up more.


But there you go! Your muffins are done and ready to eat! Here's a few more pics to help entice you to make these yourself!


Hope you enjoy these!!
Thanks for stopping by,
'Til Next Time!!

Monday, January 21, 2013

A Classic: Buttermilk Pancakes


Buttermilk Pancakes & Bacon

Now you really can't go wrong with pancakes and bacon, at least according to probably any Canadian you ask, you can't go wrong with pancakes and bacon...and maple syrup. So you might have noticed the change in the look of my blog...or maybe you haven't, either way, there's been a change. A couple weekends ago I was making these delicious pancakes and yummy bacon and of course, Facebook had to know. So my uncle, who is a Photoshop wiz, made the image that is now my background to my blog. Everyone in my family knows I love bacon, hell my sister even got me bacon socks for Christmas...and bacon popcorn, and a bacon ornament. Well the popcorn and ornament were for both me and my step-brother, we both have a bacon obsession. Let's face it, you can't put bacon on something and not have it taste good.

So I had had some buttermilk sitting in the fridge for a little bit and was determined to use it before it went bad. I have a habit of buying stuff when I see it's on sale and then I forget about it, lost in the depths of the refrigerator. Not this time!! I woke up last Sunday and was determined to finally make my pancakes! Now as I'm typing this I have a craving for French Toast...breakfast foods are really the best thing ever aren't they? As I was finishing up the pancakes and the bacon my step-brother emerged from his room, probably following his nose to the source of the bacon smell. Luckily he was hungry. Our other roommate wasn't, of course. I was glad, otherwise I would have had a lot of pancakes left over...I probably would have eaten all the bacon myself. :-)

So here's what you'll need and what you'll do!

First of all you'll either want a griddle or a large skillet. I use my Cuisinart 5-in-1 Griddler/Panini Press to do my pancakes or french toast when I make it. A large skillet or frying pan will work just fine too though so no worries! Now for the ingredients...

2 cups all-purpose flour
1 Tablespoon sugar
1/2 teaspoon baking soda
1/4 teaspoon salt
1/8 teaspoon baking powder
2 eggs, lightly beaten
2 cups buttermilk
1 Tablespoon canola oil
* you can add in 1 cup of fresh or frozen fruit/berries of your choice if you want*


First either set your griddler to around 375-400 degrees Fahrenheit or get your skillet warmed to a good solid medium heat.


In a large bowl you're going to combine the flour, sugar, baking soda, salt and baking powder. Mix it all up and set it aside briefly while you get the eggs and such ready.


You're going to beat the 2 eggs together, lightly. Don't go all crazy and beat them for 5 minutes. That's just going to be a waste of time and you don't want that. It's only going to delay eating the pancakes in the end.


Once the eggs are lightly beaten add in the 2 cups of buttermilk and the Tablespoon of canola oil. Whisk it all together until everything is nice and evenly blended. You need to really whisk is at a fast pace to get the oil to combine with the buttermilk and egg, don't want to to stay separated like it will be when you originally pour the oil into the mixture.


Make a well in the dry ingredients like so...


And pour the buttermilk mixture into the well. Mix it all up JUST UNTIL the ingredients are MOISTENED. Having a few smallish lumps in the batter is completely OK. In fact it's good. Pancakes are something you really don't want to over mix at all. Over-mixing will the light fluffy texture to go down the tubes and then you have dense, hard, yucky pancakes. Eww.


This is what your pancake batter should look like. Notice the lumps and bumps in the batter? Yeah, that's what you want. So if your batter looks like this, you're golden! And ready to get them on the griddle...or skillet.


Now pour the batter by the 1/4 cup onto the griddler or skillet. I use my batter despenser, mainly because it's way easier to see how big your pancakes are going to be and also because it's so much cleaner. I'm not scooping batter out with a measuring cup and making lop-sided pancakes. This one that I have here is from Sur La Table just squeeze the red handle and the batter comes out the bottom. Best thing ever. Works great for cupcakes too!


*If you're adding fruit now is when you would sprinkle the pancakes you've just placed on the cooking surface with the fruit then continue on*

So once you scoop or dollop or how ever you're getting the batter from the bowl to the cooking surface you're going to wait a little bit and watch them....still watching? Good. Once the pancakes start to form little bubbles on the surface it's time to flip the pancakes over. This can be a little tricky, it usually takes be a couple of tries to really get the pancake-flipping art down when I make a batch of these. Little patience and even less hesitation when you flip and you'll be good to go.


As you can see these are nicely browned on the first side, now the trick is too figure out when they're browned on the second side without picking them up to investigate every 10 seconds. Let them cook for a good few minutes before you even think about checking to see if their done. If they move around the pan easily they're getting close, now is when you can start checking every minute or so. Once they've reached the desirable brown/goldenness take them off the griddler/skillet and either enjoy right away or stack them in an oven at 160 degrees Fahrenheit to keep them warm until the whole batch is done.


I like to fry up some bacon in a skillet with my pancakes, because it's not breakfast without bacon. The spatters of oil, well I don't even feel them now. Just kidding, I totally do and they hurt. But bacon is well worth the pain and effort of cleaning a greasy stove top.


Well there you go! Top the pancakes with butter, syrup, jam, jelly, whipped cream...whatever your heart desires. Oh you could pour some bacon grease on them! I don't know...but it's bacon grease, if you're into that more power to you...could be yummy. People add bacon grease to lots of things. Pancakes might be one of them. Me? I prefer some butter and syrup. Can't go wrong there.

Well I hope you enjoyed my post!
I also hope you enjoy these pancakes if you choose to make them!
'Til Next Time!!

Sunday, January 13, 2013

Sirloin Beef Stroganoff


Sirloin Beef Stroganoff

I love, love, love beef stroganoff. So when I had the idea to create my own I was more than excited. Stroganoffs are fairly straight forward. Take some protein (beef, pork, chicken usually), add some liquid (usually a broth of some sort), throw in some veggies if you want, some spices, an ingredient to thicken the broth up. Let it simmer and then serve over noodles...or rice.

Seems simple right? Well, it is. Or at least it was for me. I've made Beef Stroganoff before from a different recipe and it was good, but I wanted to do something a little different. So after looking up a couple different recipes to see what other types of ingredients I could include I came up with this one! 


So here's what you need, equipment wise: a stockpot to make the noodles and either a sauté pan or a chef's pan. They're very similar. The one that I used for this recipe has straight edges not sloped. I wouldn't recommend making this one in a skillet, it needs to be a little deeper since you end up with everything in the pan, minus the noodles.

Anywho...let's get started with the ingredients


About 1 lb to 1-1/2 lbs top sirloin cut into 1 inch pieces
2 Tablespoons all-purpose flour
1-2 Tablespoons olive oil
1-2 Tablespoons butter
1 green pepper, chopped
3 Tablespoons dried minced onion
1 can (14 oz) beef broth
1/2 cup sour cream
2 Tablespoons tomato paste
2 garlic cloves, minced or crushed
1/2 teaspoon paprika
Dash of salt
1/2 teaspoon black pepper
1/4 teaspoon parsley flakes
1/4 teaspoon ground mustard
1 Tablespoon Worcestershire sauce
Cooked Pasta of your choice


Alight, so what I did first was cut up my sirloin. If you don't want to use sirloin you can use pretty much any other beef you want. I just chose sirloin because I enjoy the taste of it.

Once that's all cut up, set it aside for a couple minutes.


Next, I chopped up my green pepper. This one actually chopped up easily. Sometimes I have a bit of a hard time getting the seeds out. This one worked with me.

Side note: If you've noticed I have specific cutting boards for different types of food. Red-Meat, Orange-Veggies, Green-Fruit, Yellow-Poultry.


I was doing my best to be organized. I was cooking dinner for my friend Taylor and I didn't want to feel like a chicken with my head cut off. So I managed to get everything together before I actually started cooking. So I got my beef broth, butter, garlic, spices, sour cream and tomato paste all together before I even started cooking the beef. And what do you know, it worked. I should really do that every time, shouldn't I?


So once you have everything prepped and ready, go ahead and put the 2 tablespoons of flour and the strips of sirloin into a Ziploc bag and shake to coat the meat with flour.


Also, around now is when you're going to want to start to boil the water for your noodles.


In a large sauté pan or chef's pan, whatever you have decided to use. You're going to melt the butter over a medium heat, add in the olive oil, and the crushed/minced garlic. Add the sirloin to the pan and brown the beef.


Once the beef is browned add in the chopped green pepper and dried minced onion. Cook that for probably 2 minutes.


Now you're going to gradually stir in the beef broth and bring it to a boil.


Once the broth starts to boil, let it cook for about a minute then reduce the heat to low and let it simmer as you get the next step ready.


In a small bowl, combine the sour cream, tomato paste, and the spices. Stir it so it's mixed together nicely.


You're going to stir that into the beef mixture. But DO NOT BOIL, keep this at a low temperature.


Add in the Worcestershire sauce and a bit of extra flour to help thicken the Stroganoff up. You're going to cook/simmer this uncovered over a low heat for about 15-20 minutes. Around now is when your water should be boiling...or almost boiling. I managed to time mine right around the 13 minutes mark of the simmering of the Stroganoff so both were done at exactly the same time. Couldn't do that again if I tried probably.


Mmmmm looking good, right? I was definitely beginning to drool over this right about now. I added a bit of extra flour to thicken it up a bit since I used a whole can of beef broth.

The timing worked out, so I believe I simmered this for about 22 minutes.


When you're noodles are done, drain them and spoon this deliciousness right on top of them.


This should serve about 4-6 people comfortably. I used Rotini noodles, they've been a new favorite of mine.


Well, I hope you enjoy this one! Clean up was fairly simple too. Just the couple of measuring ups, the cutting boards, and the 2 pots/pans. I did most of the cleaning during the 15-20 minutes that the Stroganoff was simmering.


Refrigerate leftovers if there are any!
'Til Next Time!!

Thursday, January 3, 2013

Happy New Year!!


Happy New Year folks! So I spent my new years quietly at home, which was nice. No need to go out and get hammered and get pulled over or worse get in an accident. So I had a few friends come over and we just hung out and rang in the new year quietly. Then lucky me, I spent the whole next day in bed because I caught the bug that my entire family had up in Canada. Oh yeah, I was in Canada a few days before the new year. My cousin got married! It was a beautiful wedding and I have about 3 more of my cousins' weddings to go to within the next year or so. So I'll be seeing a lot of my Canadian family, which is GREAT! Growing up with them all around me then moving to California and only seeing them once a year was hard enough. Now I only see them if they come down to Arizona to visit me or if Dad is generous enough to fly me up to Winnipeg.

Well here I am a few days later and feeling better for the most part, still stuffy and congested, but the urge to stay in bed all day has subsided a bit. Luckily I have a few more days before I'm due back at work at the pre-school.

I've been feeling a bit of a cooking itch lately, I just want to go to the grocery store and buy all the food so I can make hundreds of different meals and snacks! Of course my bank account tells me otherwise, and also the small fact that I would have so much food and not nearly enough people to eat it. But I think I can manage a couple things and get a couple friends over here to share my food with me.

I think tonight I'm going to try my hand at my own Beef Stroganoff. I've made one recipe before (as you can see from the picture) and I really like it, but I think I want to try it again with some different stuff in it. Since Stroganoff is a pretty basic recipe, ingredient wise. Basically beef broth, sour cream, and some spices. The taste can vary however with what spices you use and of course the ratio of broth to sour cream. You can also use a cream of whatever soup instead of broth. Yes, I've been researching this since yesterday.


I've also been really wanting to explore some crab dips. I'm not big on seafood. I don't know, just the texture of most seafood doesn't sit well in my mouth. My parents think I'm weird for it, but who knows maybe one day I'll start to like it. Oddly enough, I do like crab I've had several crab dips and last week I had some crab along with my steak while out to dinner with the parents before our flight up to Canada. So who knows, maybe I'll venture into the depths of the ocean this year and try out some seafood stuff.


I've been trying to think of some new challenges for me. I like a lot of my recipes that I've made thus far, but I feel like I've got a good feel for my kitchen now and I think I can start to do some slightly difficult things. If you haven't noticed, I do a lot of recipes that call for the protein to be cut up into small pieces. I did this a lot with chicken in the beginning because I was worried about under-cooking it then the whole food poisoning thing wouldn't have been much fun. I also want to try to start working on some steaks. Who doesn't love a good steak? There's also this recipe for a Spinach Stuffed Pork Tenderloin I've been dying to try. Hmmm so maybe you'll be seeing some of this stuff in future posts.

So here's a few things to look for in the coming months...

Sirloin Beef Stroganoff
Chicken with Apple Cream Sauce & Sesame Asparagus
Spinach Stuffed Pork Tenderloin
White Russian Cupcakes & Blue Moon Cupcakes (you can thank Pinterest for finding me these ones)

Cinnamon Apple Pancakes...a healthy breakfast

3-Cheese Stuffed Manicotti Noodles

Grandma's Oatmeal Raisin Cookies...my dad's favorite

Just to give a preview of what 2013 will hold me for :)
See you soon!
'Til Next Time!!