Thursday, July 4, 2013

What's on the Menu? Roasted Red Pepper Sauce!


Roasted Red Pepper Sauce 
with Pork Kielbasa and 4-Cheese Raviolis

I know I said I was going to be better at posting...3 weeks ago...I swear I need to get myself on a schedule. The only reason I'm posting now is because it's the fourth of July and I don't have work today! Woohoo! Nothing like still waking up at 8am...ok better 8am than 5:45am like I normally do. So technically I did sleep in. Happy 4th everyone! I'm sitting here, with my coffee basking in the glory of not being at work today. Actually, I still love my job, but any day off is a fantastic day. I get to spike my coffee today too! I can't do that at work...

So about this Roasted Red Pepper sauce, I'm actually quite proud of it. I originally was just going to make an Alfredo sauce and toss in some finely chopped roasted red peppers. Then I thought, "naw, Kendra you can do better than that."


I started this whole thing off because I had a jar of roasted red peppers in my pantry...I really wanted to make a pasta sauce...this is what it lead too. Well that and half a bottle of wine. Trust me, the wine enhances my food making creativity!

Shall we get started? I think, yes!!


Here's what you'll need: (These amount make enough for about 3-4 generous servings or 5-6 smaller not so generous servings)

1/3 of a LARGE red onion, or about 1/2 of a medium one, chopped
3 Roasted Red Peppers, pureed
2 garlic gloves, minced/crushed
some olive oil
8 oz Tomato sauce
1 Tablespoon butter
3/4 teaspoon Basil
3/4 teaspoon Italian Seasoning
1 teaspoon Black pepper
1/2 teaspoon salt
1/4 cup white wine OR water
about 3/4 cup heavy cream
1 lb pork Kielbasa sausage, chopped into bite-sized pieces
1 package 4-cheese raviolis

**disclaimer, those amounts for...Basil, Italian Seasoning, Pepper, Salt, heavy cream, wine, butter...kinda of estimates I don't really measure when I'm creating I guess how much I need to make it taste good. I've said this before, start out with small amounts then add. MUCH MUCH MUCH easier to add than to take away!!


First thing you're going to want to do is prep everything. Chop the onion, crush the garlic, puree the roasted red peppers. If you don't you'll quite possibly be running around like a mad scientist in your kitchen. I say mad scientist in the kitchen because it creates a better picture than a chicken with it's head cut off. I'm going to say if the chicken is in your kitchen, it's head is already going to be off and then it's expected. The mad scientist? No that's not expected at all.

Everything all prepped and ready to go? Great! Now let's really get started!!


Take a very large skillet or chef's pan, I used my 12 in Scanpan Pro IQ chef's pan for the sauce, I wanted to make sure I'd have enough room for the sauce, and the Kielbasa once I got to that point.


Anyways, take your chopped onion and crushed garlic and saute it over a medium heat in about 1 Tablespoon of olive oil, give or take. Let the pan heat up for a couple of minutes before tossing in the oil, onion, and garlic. Once it's in there saute for about 5 minutes.


Next up, add in the Tomato sauce, pureed Roasted Red Peppers and the 4 seasonings I listed above. Again start with small amounts of the seasonings, maybe 1/4-1/2 teaspoon of each. Then add more as you taste and go along. Stir this around every couple of minutes for about 10 minutes. During that 10 minutes you can add in the bit of water or wine, as well as that 1 Tablespoon of butter.


While that's going on, chop up your Kielbasa and get it going in another skillet over a medium heat. Add in a bit of wine or oil to keep the pieces from sticking. You're going to cook these until they're heated through and have got a bit of a crispy edge to them on the outside.


The Kielbasa is cooking, so now would be a good time to start to get your water boiling for the raviolis. Got that? Good! Now, grab about 1/2 cup of heavy cream and pour it into the sauce. This will get it to be that nice lighter color. Let it simmer still at that medium heat for about 5 minutes. Then lower the heat and taste it. Does it taste good? Do you need more spices? If so, add some. Also, add in another 1/4 cup of heavy cream after about 10 minutes. Then you just let it simmer at that low heat until everything else is ready.


Once the Kielbasa is done, toss it in with the sauce! Ahhh it looks so good!!! Coat the Kielbasa with the sauce and continue to let it simmer at that low heat. Your water should be boiling sometime soon for the Raviolis. 


Cook those according to package directions and keep tasting your sauce, if it needs anything else go ahead and add it in. More cream? More wine? More spices? Use your best judgement and adjust it to your taste preferences!! Once the ravioli's are done, drain the pasta and transfer them to either a serving dish or directly to a bowl!


How I served mine was to put some Raviolis in a pasta bowl, top it with a generous amount of sauce, then sprinkled some Romano cheese on top. Delicious? Why yes, it was. Here's some other pictures to leave your with. Hope you enjoyed this one!!


Thanks for stopping by! And have a safe and happy 4th!!!
'Til Next Time!!

***Update Feb 2014! If you don't want to use Kielbasa, use some spicy Italian sausage, or which ever type of sausage/meat/protein you'd like!! I made this for my cousins and sister last month and I used some really delicious sausage instead of the Kielbasa, it was awesome!!

Saturday, June 15, 2013

Ribs Slow Cooked to Perfection


Slow-Cooked Short Ribs
delicious ribs slow cooked to perfection

Alright, so I made these quite some time ago. But I stared at them in my cookbook for a solid 3 months before making them. Why? I do not know. So as I sit here, inside on yet another insanely hot day in Arizona I figured I should get off my ass and write a blog post. I've been incredibly lazy with it lately. I don't know why. Well, actually I do. I started a new job a month and a half ago and I jumped into a new relationship with an amazing guy. So forgive me if I've been spending more time in the kitchen with him cooking and not taking as many pictures. No fear, I'm getting back into it,because I miss my blog.

As the summer heat sets in here in Arizona, I really look for ways to cook my delicious food without heating up my whole house. My BBQ and slow-cooker are my saviors now. Instead of using my oven I get in the habit of slow cooking it all or using the BBQ. So this recipe makes about 12 servings, or well the one in my cookbook did. I cut it in about half when I made these, I didn't need to feed 12 people. Really I just needed to feed myself and my dad because he came over the next day for left-overs. I think my brother ate some too, actually I'm pretty sure he did. Anyways....here's what you'll need to get these started! Keep in mind this is cutting everything in half down to about 4-6 servings.

1/3 cup all-purpose flour
1 teaspoon salt
1/2 teaspoon black pepper
2-3 pounds boneless beef short ribs
3 Tablespoons of butter
1/2 large white onion, chopped
3/4 cup Beef Broth
1/3 cup + 1 Tablespoon red wine vinegar
1/3 cup + 1 Tablespoon brown sugar
1/2 cup chili sauce
1/4 cup ketchup
1/4 cup Worcestershire sauce
3-4 garlic cloves, minced or crushed
1 teaspoon chili powder


OK so the first thing you're going to do is grab a large resealable bag, toss the flour, salt, and pepper in it and shake it around a bit to get everything all nice and mixed up.

Toss the ribs in there in batches and coat them in the flour. Once that's done you can discard any left over flour mix, but I don't think there will be much if any left over if you've coated them properly.


Do they look like that? Excellent! Now grab a large skillet and brown the ribs for a couple minutes on each side in the 3 tablespoons of butter. Browning the ribs is a really smart thing to do when you're slow cooking meats. Helps lock in flavor and what not.


They look delicious already don't they? Yeah I thought so too. Well once you've browned them toss them in a 3-4 quart slow cooker (use a 6 quart or larger slow cooker if you're doubling the amounts I gave here to make the "full" recipe).


I'm serious. Set those aside, we got lots of work to do on that BBQ sauce they're going to cook in!!


Grab all those other ingredients listed. Yes ALL of them you're going to need them. Remember that skillet you browned the beef in? You didn't clean it did you? I hope not, because you're going to use that to make the sauce.

Toss everything into the skillet. All of it, ketchup, red wine vinegar, brown sugar, beef broth, Worcestershire sauce, spices, chili sauce...the onion, it all goes into the skillet.


Cook and stir everything together, then bring the sauce to a boil. Let it boil for a couple of minutes to let the flavors come together. Once that's all set pour the sauce over the ribs in your slow-cooker.


Now for the hard part. Set the ribs to cook for about 6-8 hours. Cook them on low for however long it takes for the meat to be really tender. Mine were falling apart, in a good way, they were so tender. 6-8 hours is a long time to wait for food, I know, so you can amuse yourself while the ribs cook. Me? I made whole wheat dinner rolls from scratch, and also Scalloped potatoes. It helped pass the time. Hell, throw a salad in there too! Make a complete meal!


Yep....still cooking....patience is a virtue you know...


Have a beer it'll help pass the time...


Amazing. Yes? Well believe me, if you could smell it you'd be saying it was amazing. Trust me on this one, trusting me in the kitchen is something you can do easily. Once the 6-8 hours of slow cooked torture is over you can enjoy these!! Yay!! Clean up is a breeze too since you only used 1 skillet and probably 1 knife and cutting board. So simple!


Here's what my completed meal looked like, just looking at these...I want them again!!


Hope you enjoy these ones!!
Thanks for stopping by, I promise I'll be around more often sharing my next adventures!
'Til Next Time!!

Wednesday, June 5, 2013

My apologies for the long silence...


Again...It's been a while...


Ahhh I've been so busy lately with the new job and settling into the new routine. I promise, promise, promise, I will start to post more often once again. Just need to set aside some time specifically for this. I miss my blog, have no fear! I will return, and I have not stopped baking and cooking! I have lots to post and lots to ramble on about!


 Like my Pineapple Upside-Down muffins?

Or how about my Veggie Alfredo?

See? There's plenty to come!!! I"ll be back soon!! Have no fear!!


Saturday, May 18, 2013

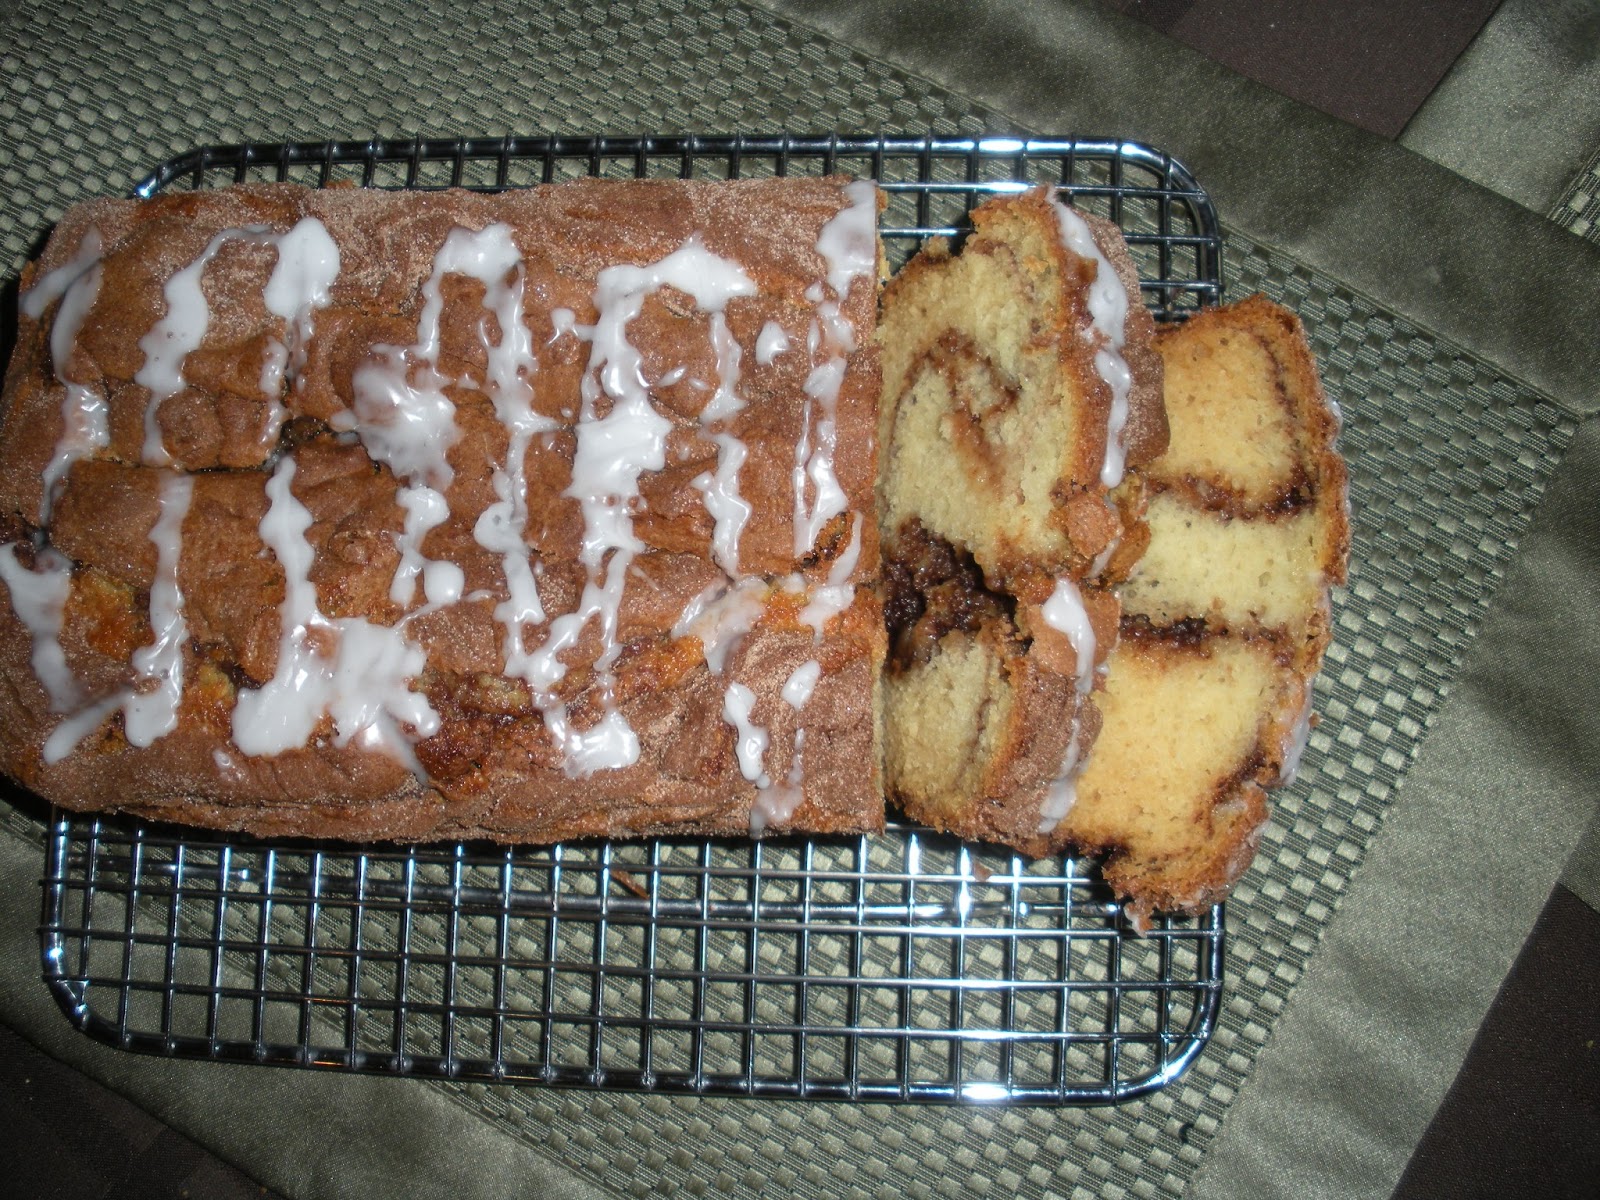
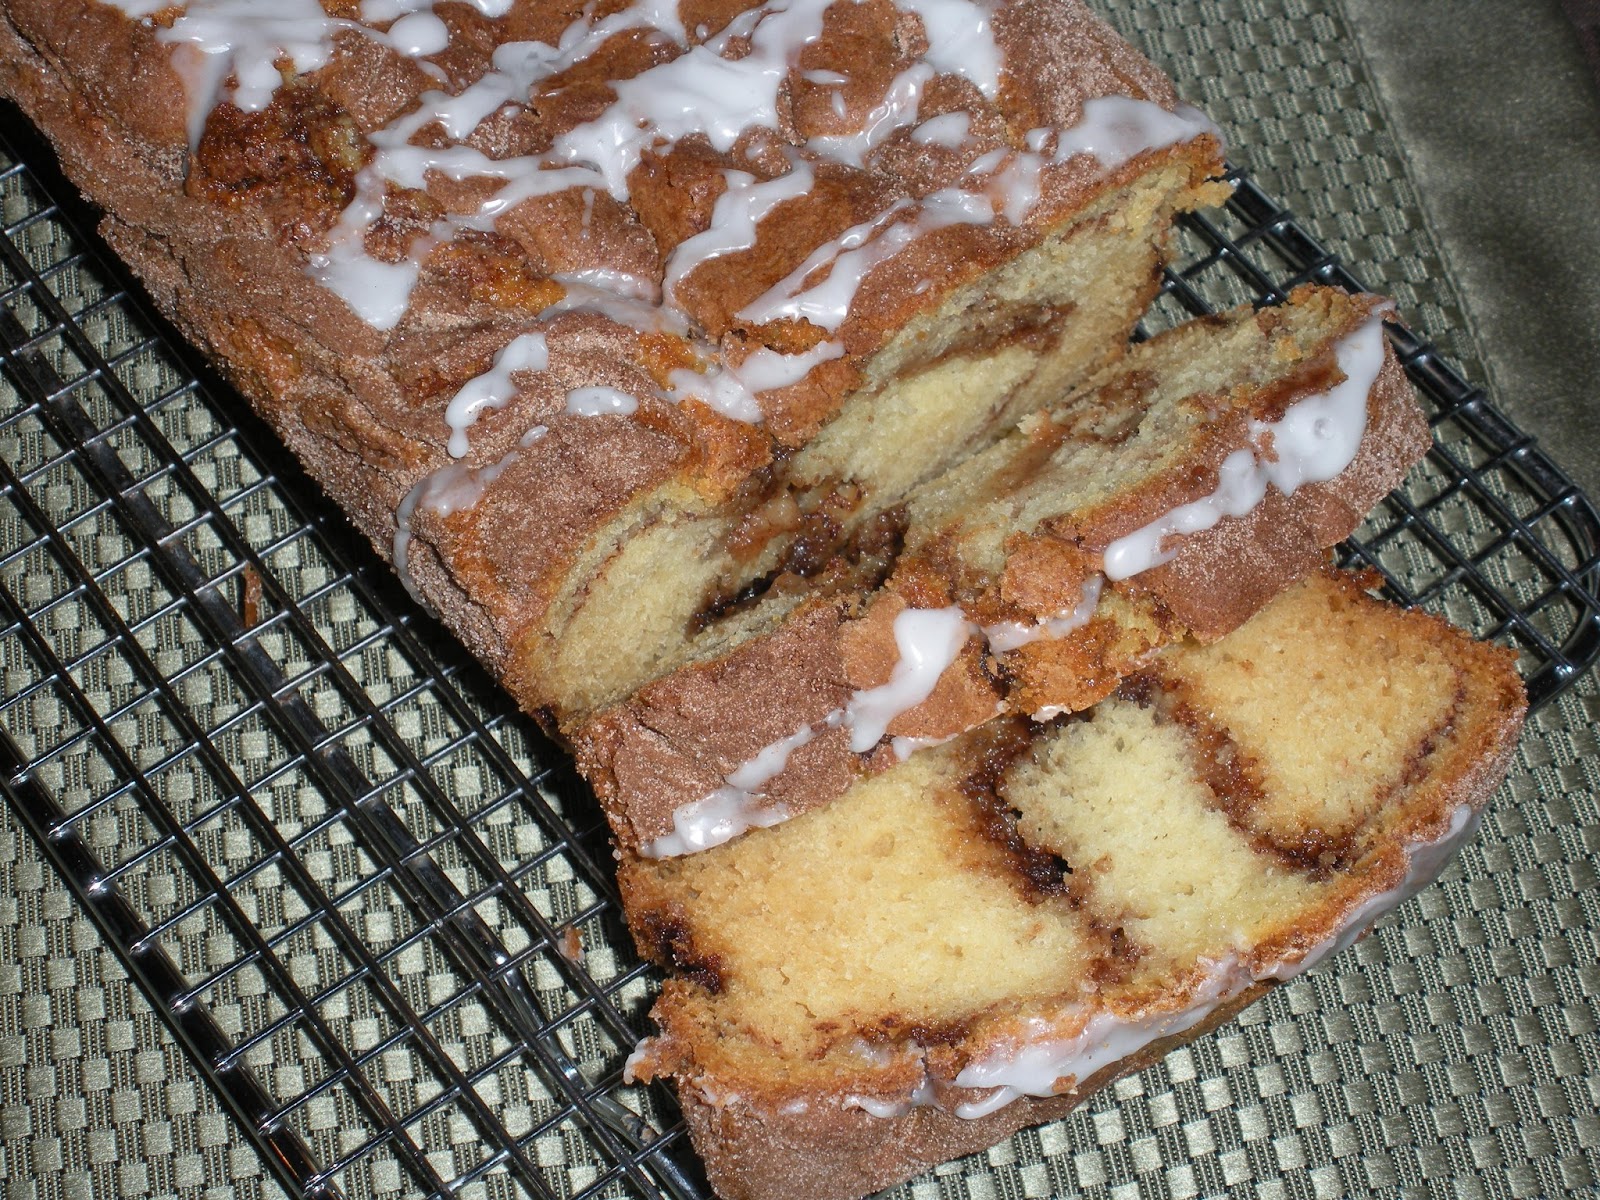
It's Been a While...Time for Some Cinnamon-Swirl Bread!


Cinnamon Swirl Quick Bread!

There has been a definite lull in my postings for the past few weeks. Why? Oh just because I've started a new job and my life has been insanely busy. I really shouldn't make excuses though, there should always be time for my blog and cooking. Which, I have been cooking, just haven't been taking my pictures and posting them to my blog. Oh well, guess that just means I'll have to make some of my recipes again! I did however manage to take picture of this delicious bread.

Now, this bread is so freaken good. And it's so easy to make. Just a few ingredients, most of which you probably have lying around the house already! This bread goes great with a cup of coffee in the morning or it could be an afternoon snack...evening dessert. It's a multi-functional bread really. I usually eat mine in the morning with my coffee. Speaking of...I need some. *wait 5 minutes* Ahhh coffee, yummm. I've pretty much kicked my redbull habit now. Only maybe once or twice a week do I have one. Way better from 1 or 2 a day.

Anyways, back to this bread. Here's what you'll be needing!

2 cups all-purpose flour
1-1/2 cups sugar, divided
1 teaspoon baking soda
1/2 teaspoon salt
1 cup buttermilk
1 egg
1/4 cup vegetable oil
1 Tablespoon ground cinnamon

For the Glaze:

1/4 cup confectioner's sugar
1-1/2-2 teaspoons of millk


Now let's get started! First things first you're going to preheat your oven to 350 degrees Fahrenheit. I started using my Breville Smart Oven to do a long of my bread baking, well just a lot of my baking/cooking in general because it's getting to be summer in Arizona and I really don't want to heat up my whole house. That and I just love using my Breville. So preheat that oven!


Grab your dry ingredients! In a large bowl combine the flour, 1 cup of sugar, baking soda, and salt.

Set that aside for just a minute or two...or three.


Now in a separate bowl combine the buttermilk, egg, and oil. Whisk it together really well the the egg is well beaten and the oil is combined in with the buttermilk and egg. Oil has a tendency to want to stay separate so really work it in there!

Make a well (or a hole as my Baba says) in the dry ingredients and pour the buttermilk mixture into it. I never used to do this, turns out it really helps you mix everything up with out the fear of over mixing, which in baking is a big No-No.


Does it look like that right now? Good. Grab a spatula or spoon of some sort and mix the ingredients JUST UNTIL MOISTENED!!!


Oooooooooooo! Looking good!! Stir it just a little bit more to get those dry parts moist!!


STOP!!! Yes! That's perfect! Don't mix anymore!!

Now grab a 9x5 loaf pan. Grease the bottom of it. Just the bottom! I usually take some shortening and grease it. The more I use my Pampered Chef stoneware though, the less I need to grease it. I just greased it this time because I hadn't used my loaf pan in a while. Although right now...I really want to make some bread. Maybe I'll do that later today...or tomorrow. Hmmmmm ok I'm getting off topic, it might be the coffee kicking in!


OK take about half of the batter and pour it into the loaf pan.


Now you're going to combine the remaining sugar and the cinnamon then sprinkle about half of it on top of the batter that is in the pan like so -->


Now, repeat!


Pour the rest of the batter...

Then the rest of the cinnamon sugar. Now take a knife and GENTLY cut through the batter to create a swirl of cinnamon sugar. Don't over swirl it, then you won't have that delicious cinnamon-sugary swirl in the bread it'll just be...well all mixed together.


Bake the bread at 350F for about 45-50 minutes depending on your oven. You want a toothpick to come out clean when it's inserted into the center of the loaf. But sometimes with the cinnamon-sugar swirl it will appear to come out sticky. Just try to find a place that isn't so swirl heavy to do your toothpick test. Wouldn't want you to dry out and over bake your delicious, tasty bread!!

Let it cool in the pan for about 10 minutes before removing it to a wire rack to cool completely.


Now for the glaze....

Take the powdered/confectioner's sugar, whatever you want to call it, and add the milk. Add just enough milk to get the glaze to the right consistency to drizzle it over the loaf of bread.


Yep, just like that!


I like to just gently drizzle it over the loaf and sometimes let it drip off the sides a bit. Occasionally I do need to make a bit more glaze depending on how much I want on my bread and how my drizzling technique is that day.


Just to leave you with a few more pictures to drool over and convince you to try this one out!


Not that you really need much convincing, right?


I mean come on...this looks freaken delicious, doesn't it?

Damn right it is!!
Thanks for stopping by I hope you enjoy this one as much as I do!!

'Til Next Time!!
(I'll try not to make it be another 4 weeks...)

Thursday, April 25, 2013

Broccoli & Pepper Jack Potatoes...Twice Baked


Broccoli & Pepper-Jack Twice Baked Potatoes


I know, it's a mouthful to say. But trust me, it's even more delicious to eat!


A few weeks ago, I was making my Chicken in Apple Cream Sauce (which will be my next post most likely) and I was trying to think of what I wanted to go with it. Usually I'll do rice and a veggie of some sort. However, this time I didn't feel like rice. I wanted potatoes. Then I started thinking, what if I did my twice baked potatoes...but changed it up a bit? I had a head of broccoli in my fridge along with some cheese and green onions...why the hell not? So I started on my merry way and they turned out great! Then last week I made them again...except I made them with a couple differences, which I will explain as we go along. It's always nice to have options right?

Oh and by the way, in case you're interested. I got that job I was hoping for. No more preschool for Kendra! Ahh happy day! Now let's get started on these potatoes!

Here's what you need...

4 Large Russet Potatoes
2 Large heads of Broccoli
1 Tablespoon olive oil
3 Large cloves of garlic OR about 1-1/2 teaspoons garlic powder
1 Tablespoon dried minced onion
1 teaspoon black pepper
3/4 teaspoon salt
1/2 teaspoon white pepper
1/2 teaspoon ground mustard
2 teaspoons dried parsley flakes
3 green onions, chopped
3/4 cup half-and-half cream
3/4 cup sour cream
About 1 or 1-1/2 cups Pepper-Jack Cheese

I'm going to be honest, those measurements are a total guess. I realize I never wrote down the amounts I used on this one. It's ok though, just start with small amounts and work up to what tastes good to you! Alrighty first things first.

Preheat your oven to 400 degrees Fahrenheit.

Take the potatoes and clean them off. Stab them with a fork a bunch of times and then place them on a baking sheet. Pop them in the oven for 1 hour and 20 minutes. Yes, it's a long time. But you want the pulp of the potatoes to be really soft. While the potatoes are baking, and no rush at all, you can get the broccoli going.


First chop up the broccoli into bite-sized pieces, like the picture above. Grab a large skillet and get it warmed up on a medium heat. Drizzle the oil into the pan once it's hot, then add in the broccoli. Now here's where I did things differently. The first time, I seasoned the broccoli with black pepper, garlic powder, and minced white onion. Which works, it totally works.
Then second time I used fresh garlic. I love fresh garlic. So I would recommend the use of fresh garlic over powder. I also added a bit of ground mustard to the broccoli and probably a bit extra black pepper. I love pepper about as much as I love garlic.

Once the broccoli is done, which takes about 7-10 minutes to get it nice and tender. Tender, but still crunchy to the bite. Not mushy, mushy broccoli is just...yuck. So set that aside and play the waiting game for the potatoes to be done...


Yep...still waiting...you're probably not just making the potatoes so you might be busy doing other things during this time. So you are most likely not just standing around watching the potatoes bake. Or if you are...a watched potato never bakes. Or it does, just takes forever.


Once the potatoes are done let them cool off. Don't be like me and burn the tips of your fingers. Who needs nerves in their fingertips anyways? Oh wait, I do! Are the potatoes cooled off now? Great! Slice off the top third of the potato, if the insides are still really hot or warm let them cool with the tops off for another 5 minutes or so.

Next you're going to scoop out the pulp, from the top third and the other two thirds. Place all the pulp in a large mixing bowl. You want to leave a thin layer of the insides of the potatoes because you need them to have some form when you go to re-stuff them in a little bit.


There you go! Hollowed out potato shells! OK now let's get back to all the pulp and get the next part of this process going!


Mash the pulp, you know like mashed potatoes! I don't add anything else to them yet. Just mash them as they are. They pulp should be soft enough that you can do it by hand and not worry about dirtying you hand mixer. Unless you want to. You're more than welcome to.


Once that's all mashed up I take my half-and-half and my sour cream and add it in. Start with adding about 1/4 cup of each into the potatoes. I start with 1/4 cup of each so I don't accidentally over do it and then have soupy potatoes. Here is also where I begin to add in the white pepper, ground mustard, green onion, parsley flakes, salt, and a bit more black pepper. Add in enough cream and sour cream until the potatoes are a nice smooth, creamy consistency.


Now take the sautéd broccoli and fold it into the potatoes.
Preheat your oven again, but this time to 350 degrees Fahrenheit.


Now it's time for the cheese. The first time I did this, I stirred the cheese right into the potato mixture. The second time...I started to stuff the potatoes and forgot all about the cheese, I was too excited about how good the broccoli tasted. So I layered the cheese into it. Filled the potatoes about half way, sprinkled a layer of cheese, filled it up to the top of the potato, more cheese, then mounded more filling on top and (yes) topped it with more cheese! It was good. I think I'm torn between which way was better.


They look good enough to eat right now don't they? See how there's not a lot of cheese on top though? Yeah I did too...


So I added more! Now pop these back into the oven for another 30 minutes. The cheese will melt, the top with brown and you'll be staring into your oven with a steady stream of drool going down your chin in no time. I mean that in the best possible way.

OK so these are a bit time-consuming and there is sort of a lot of work that goes into them. But trust me, it's easier than you think and it's completely worth it once you take a bite of the rich, creamy, twice-baked wonderfulness that are these potatoes.


Just to leave you with a couple more pictures in case you needed any more convincing to give these a try.


Thanks for stopping by! I hope you enjoy these!
Stay tuned for my Chicken in Apple Cream Sauce, and many more things to come!
'Til Next Time!!