Sunday, March 24, 2013

Cupcakes a la White Russian


White Russian Cupcakes!!!

Alright, so the story behind these cupcakes...I was on Pinterest and I kept seeing this post about these White Russian Cupcakes. Cupcakes with alcohol in them?! Oh my god, yes! Since discovering these one I've found a whole lot of different cupcakes based off of drinks! My "cupcakes to-make" list grew exponentially after this day. So I clicked on the Pin and it took me to this fabulous blog. This girl's blog, Baked Perfection, is awesome. She's got a major sweet tooth and has quite the talent for baking. She's pretty inventive too. So I emailed her asking if I could post her White Russian Cupcakes to my blog and she graciously agreed. Of course I'm giving her credit. I wish I had thought these up on my own...maybe one day...

The Kahlua Buttercream frosting for these is to die for. I could probably make some right now and just eat the frosting. So good. So, so, so, so, so good. The taste of vodka and Kahlua in the cupcake itself isn't super strong either, which is wonderful. There is still a sweet, light, cupcake taste with just a hint of the booze. I used a piping bag for the frosting for the first time with these too...Took a few tries but I got the hang of it by cupcake #4.

Shall we get started? Grab some bowls and get ready to have a blast making these!! Here's what you'll need!

1-1/4 cups all purpose flour (I added an extra 1/4 cup at the end before baking)
1-1/2 teaspoons baking powder
1/4 teaspoon salt
3/4 cup sugar
6 Tablespoons butter, softened
1 large egg AND 1 egg white
1 teaspoon vanilla extract
1/2 cup milk
1/8 cup vodka
2/8 cup of Kahlua, divided into 1/8 amounts


First...preheat your oven to 350 degrees Fahrenheit.


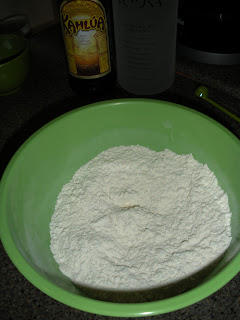
Grab a medium sized bowl and mix together the flour, baking powder, and salt. Set that aside for a few minutes.


In a different bowl cream the butter and sugar until they are light and fluffy. Once that's done, add in the egg and egg white one at a time. First at the egg in to the butter/sugar creamed mixture with a hand mixer or in a stand mixer. Then add in the egg white, again mix well.


Once that's all mixed in, time to add in the fun stuff! Grab the vanilla, vodka, and 1/8 of a cup of Kahlua!


Throw those into the creamed mixture and again, beat until well combined.


Now it's time to do that alternating thing between adding in the dry flour mix and the 1/2 cup of milk into the creamed mixture.I started with the dry mix, added in about 1/3 of the mix and then beat it to mix the flour in. Then I added about 1/4 cup of milk, again beat it until mixed in...repeat until both the flour mix and milk are well blended into the batter.

Now you're probably sitting there going, "this looks pretty thin to be a good cupcake batter." Or at least I was, it is pretty thin, so I added an extra 1/4 cup of flour here. But there you go, cupcake batter is all done. Pour batter into paper-lined muffin cups!


I used fancy liners this time instead of plain white ones...probably because of the picture on Baked Perfection's blog. She used black and white liners and I liked how it looked. You can use whatever color you want...anyways...

Bake the cupcakes for 17-20 minutes, depending on your oven of course! I put mine in for 10 minutes then turned the pan around because I have a slight hot-spot in my oven then baked for another 10.


Ooooooo look how good those look! I really want some of these now...hrmmm maybe later...


Once they're done baking, you'll know they're done when a toothpick/cake tester inserted near the center of the cupcake comes out clean.


Now, remember that extra 1/8 cup of Kahlua? Is that handy? It better be. What I did was poke a few holes into the top of each cupcake and then brushed the remaining Kahlua over top each cupcake. It gives the cupcake a really nice browned look. Also, it helps keep the cupcakes really moist.


Once the Kahlua has been brushed over the cupcakes, remove them from the pan and cool on a wire rack. These need to be completely cool before you can frost them...They might look good enough to eat right now, but trust me you'll want to wait for that frosting. Speaking of...here's what you'll need!

1/2 cup butter (1 stick), softened
3 cups powdered sugar
a pinch of salt
4 Tablespoons Kahlua


First, beat that butter until it's nice and creamy!
The butter needs to be pretty soft for you to get the right consistency for the frosting, but not so soft it's almost melted. Play the "just right" game with it.

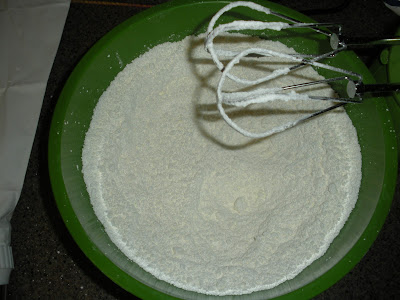
Add in the salt and the 1st cup of powdered sugar next...then keep adding in the powdered sugar about 2/3 a cup at a time. Mix it on a slow speed so the sugar doesn't go everywhere!!


It's going to look pretty crumbly and not like frosting at all. Don't worry, that's how it's supposed to be. Now is when you start to add in the Kahlua, one Tablespoon at a time. It's going to remain pretty crumbly through the first two tablespoons of Kahlua. For me, even after I added in the third tablespoon, my frosting still looked like this...

Crumbly, crumbly, crumbly! Ahhh I was beginning to doubt the liquid content. Could 1 more tablespoon really make this crumbled mess into a delicious frosting? Oh yes it could. I added in the 4th tablespoon of Kahlua and BOOM!

Frosting!!


Amazing isn't it? I think it is. OK so now grab a pastry bag and a large frosting tip. I used my M1 Wilton frosting tip to go along with my brand new featherweight pastry bag.

If you don't have a pastry bag, reinforce one of the corners of a gallon sized Ziploc bag with a few layers of scotch tape and then cut the tip of the corner off of the bag. Use a coupler with the frosting tip too. I used a coupler with my pastry bag too. There's a way you can cut off the tip of the Ziploc bag so you don't have to use the frosting tip...but I have no idea how to do that.

If you don't have a frosting tip I'm sure just the simple hole in the corner of the bag will work, the frosting design won't have the same look, but it will act the same as if I had used a round tip.


Are your cupcakes cool? Is your frosting in your pastry or Ziploc bag? Need help getting that frosting into the bag? Put the bag in a cup and fold the top over the sides of it. It will make it so you can use both of your hands to scoop the frosting out of the bowl instead of trying to scoop/hold the bowl with one hand and hold the pastry bag in the other.

Now comes the fun part! Frosting!! Don't worry if the first couple cupcakes don't turn out fantastic. Mine sure didn't...

Yeah, not to pretty eh? It's OK you can either scrape the frosting off and try again or leave it to see your progress.

The key with getting the frosting to come out nicely is to hold the bag where the frosting fills up the bag to, and create a sort of seal with that hand. With the other hand, place it near the bottom right by the frosting tip and twist both hands sort of like how you wring out a wash cloth. Use the bottom hand to guide the frosting onto the cupcake. Simply squeezing the bag doesn't quite work out. Well, it does but you tell me, how does that cupcake look? Crappy. That's how. Once I figured out the twisting technique, which took some help from Google, this is now my cupcakes started to look. My description may not be the easiest to understand. YouTube and Google saved me here.


Looks much better doesn't it? I've been continuing to work on my cupcake decorating skills since I made these last month...or was in it January...I don't remember now. I want to make them again though, they are delicious.


So like I said, don't get frustrated if you can't get the hang of it right away. Do what I did, go on Google and look up different frosting techniques and find the one that works for you!

I did start from the outside and worked my way into the center of the cupcake. That worked best for me.


So there you go! White Russian Cupcakes!

Hope you have fun with these and with the fun part of figuring out how to frost a damn cupcake nicely!

Well I'll leave you with a couple more pictures!


Well I hope you enjoy these as much as I did...do.  :)


How delicious do these look?!?!
Oh yeah store them in an air-tight container for up to 5 or 6 days...maybe a week. But I doubt they'll last that long really.


Thanks again for stopping by!!
'Til Next Time!!

Thursday, March 21, 2013

Spring is in the Air!


So Let's Eat Some Lemon Fudge!!

It's officially Spring! Ahh that means good-bye to cold weather! Me? I'm a little bummed, I love the cold weather. But this is that brief time in Phoenix where you can go outside in shorts and a tank top and not feel like you're melting into the sidewalk. Don't worry, that'll come in about a month or so. I am not looking forward to that. But it's Spring and Easter is on it's way and I think this lemon fudge will be a big hit as a different spin on an Easter snack. Me? Now I don't really do Easter, I mean not since it involved hunting for eggs and going to my Baba and Papa's house for Perogies. Oh man, those are delicious. I need to make them from scratch...hmmm I'll make that into a project for the future.

I spent the last week in Ohio visiting my sister. Well, it's a lot colder out there but that wasn't a problem. It was awesome to see her and her husband. We really spent most of the time eating and drinking...and shopping. But that's OK, it's what sister's should do. Oh! And I got to meet her ADORABLE little basset hound puppy, Bella. Yeah, she's crazy hyper, but adorable none the less. So I got back from Ohio late last night and decided today I must write a blog entry. Got a busy week coming up ahead of me, dance practice tomorrow, dance show on Saturday, back to work on Monday after my Spring Break, interview for a new job on Tuesday...busy few days for Kendra indeed. I'm excited as all hell for it though!

Now this fudge...I love lemon. I used to eat them as a kid. Just love that sour taste. I also love fudge...so this is just perfect. It's like a white chocolate lemon fudge. Can't get any better than that!! Best part is, it's super easy to make! To make this work all you need is a medium saucepan, a 9x9 square pan, and some tin foil! Couldn't get any easier!! Now as far as ingredients...

1-1/2 teaspoons plus 6 tablespoons of butter, divided
2 packages (10-12 oz each) white chocolate chips
2/3 cup sweetened condensed milk
2/3 cup marshmallow fluff
1-1/2 teaspoon lemon extract


First things first...Take the 9 in square pan and line it with tin foil. Grab that 1-1/2 teaspoons of butter and grease the tin foil. Now you can set that aside until later.


Next up! Take that 6 tablespoons of butter and melt it in a medium sized saucepan. Make sure you melt the butter over a LOW HEAT. No scorching the butter!


Then add in the chocolate chips and the milk. Stir for about 10-12 minutes, until the chocolate is all the way melted and the milk is well absorbed.

Like I said, this one is pretty simple it's really just adding the ingredients in the right order...


Next up! Stir in the marshmallow fluff...this stuff is incredibly sticky so it could take a bit of work but do your best to get all of the 2/3 cup of fluff into the fudge.


Add in the lemon extract now too and stir it until the fudge is nice and smooth like so:


Oooooooo very nice right? It could take about 3-4 minutes to get the fudge looking this smooth after you add in the marshmallow fluff and the lemon extract. Remember you're doing this all on a LOW HEAT no burnt fudge for us! Once the fudge is smooth pour it into the greased 9-in square pan. Spread it evenly so you have fudge that's all the same thickness.

Now all you have to do it put it in the fridge for about 20 minutes so it can set. Then take it out and score it...


Yes, I know my squares are no where near even...I'm bummed about it too. But once you score it put it back in the fridge to set the rest of the way. It can take a couple of hours to fully set, but luckily there's only what...one dish and a spoon to wash? Easiest clean up ever!! When it's ready, simply lift the foil out of the pan and cut through the fudge the rest of the way. Store it in the fridge and BOOM! Great Easy Easter snack/dessert for you! Or...you know, just a springtime chocolately-lemony delight!


This was a bit of a short entry, don't worry I got something good planned in the next few days. 

So you're going to have to come back and check in on that!

Thanks for stopping by!
'Til Next Time!!

Sunday, March 10, 2013

One of the Many Forms of Potatoes


Parmesan Potato Wedges!

My birthday was last Monday, it was a good one. Pretty mellow just took a half day at work then went to lunch with my friend. Then later on I took my husky over to my friend's house to play with her and her boyfriends' huskies. They're like a little family. We took them to the park and let them run around, which was fine until my dog, Aurora, decided to take off down the street as we were starting to head back to the house. Luckily my friend's boyfriend caught her. Yeah, my dog...the escape artist. I've got one more week of work then it's Spring Break and I'm going to Ohio to see my sister! Yay!! I'm super excited to see her, haven't seen her since the end of December. But that's not 'til Friday...Now I'm sitting here contemplating dinner yet again. So I might as well write my blog!

I love potatoes, in any form really. They're just so freaken tasty! Mashed, baked, shredded, sliced, wedged and covered in cheese and spices. You cannot go wrong with potatoes. These ones are awesome. These go great alongside my Barbecued Meatballs I posted last week! These are a great side dish and addition to any meal in my opinion, especially with beef or chicken. Mmmmmm steaks with these on the side? Deeeeeelicious!

Let's not waste any time! Here's what you'll need!

4 medium potatoes (I used russet potatoes, which are large but, hey they worked!)
1-2 Tablespoons olive oil
2/3 cup grated Parmesan cheese
1 teaspoon Cajun seasoning
1 teaspoon dried parsley flakes
3/4 teaspoon onion powder
3/4 teaspoon garlic powder
1/2 teaspoon black pepper


Preheat your oven to 375 degrees Fahrenheit.


Grab a cutting board and get those potatoes! Rinse off the potatoes before you cut them, like you should do with any fresh produce.

Cut the potatoes in half lengthwise then each half should be cut into 4 wedges. You should get 8 wedges per potato.


Grab a large resealable plastic bag and add the potatoes and olive oil. Seal the bag and shake to coat. This will get the potatoes ready for the seasonings! Make sure the bag is sealed...I almost had a really messy situation. That might have been the wine...


So get your spices together in a small bowl. Now get another resealable bag and get ready to coat the potatoes in this yummy mix!


Put the potatoes in a few at a time with the seasonings and shake to coat. Repeat this until all the potatoes have been coated. I had to make more of the seasoning when I was doing this, I wanted my potato wedges to have a lot of taste to them and a lot of cheese.


Once the potatoes are coated place them in a single layer on a lightly greased or non-stick baking pan. 10 x 15 or larger depending on how big your potatoes are.

As you can see, I used 2 dishes to do my potatoes. Then once I had them on the pans I sprinkled them with a bit more Parmesan cheese and a touch more Cajun seasoning. Mmmmm delicious!

Pop them in the oven, uncovered, for about 35 minutes, until they are golden brown. Turn them once around the 20 minute mark.

While the potatoes are cooking you can be like me and run around like a chicken with it's head cut off as you try to get 3 other things going too. OK, OK it was only 1 other thing. But the meatballs were a lot to do at the same time! Excuses, excuses I know.


I love the Parmesan cheese because it melts, but it crisps up too!! the Parmesan is a great cheese to have on these and the Cajun seasoning goes really well with it.

The wedges also went really well with the BBQ sauce on the meatballs...


Well there you go! Hope you enjoy these wedges along with whatever you're making!
See you soon!
'Til Next Time!!

Sunday, March 3, 2013

Delicious Barbecue Meatballs


Baked
Barbecue
Meatballs


I love that these are baked and smothered in a homemade barbecue sauce. These are great as an appetizer too! 


Here I am, on this wonderful Sunday, the day before my 25th birthday I might add, and all I want to do is cook something. Well and recover from the beer last night, which with Advil and water isn't too hard to do. Although now there's a bottle of vodka sitting on my counter trying to entice me. Maybe later. For now I'll settle for trying to think of something to make for dinner. Maybe I'll do spaghetti and meat sauce...with ground turkey instead of ground beef? Hmmm decisions, decisions...there's also a pineapple beef stir-fry I've been dying to try out. I'll mull it over and make my way to the grocery store later this afternoon.

My birthday is tomorrow, at work when it's one of the kids' birthdays they bring in a special birthday snack. Most often it's cookies of some sort. So the kids know my birthday is tomorrow and they spent all last week asking me if I'm bringing birthday snack. So I'm going to whip up some chocolate chip cookies later tonight as well. Hopefully my foot isn't giving me too much trouble in the kitchen. Yeah it's still bruised from a couple weeks ago when I came down on it wrong in dance class. Genius Kendra, bruise your foot. I danced on Thursday and it was so hard to take it easy on my foot, I just wanted to leap!

So onto this entry...I may have mentioned in my Happy New Year post. If I didn't, well there's at least a picture of these meatballs in that entry. I think my favorite thing about these is the homemade barbecue sauce. I love barbecue sauce, I think we have 4 or 5 different kinds the fridge right now. Why you ask? Well that's because you need different types of BBQ sauce for different moods. Hot n Spicy, Sweet n Spicy, original, honey sweet...then there's different brands! Ahhh so many choices!! Then there's making your own, it's always fun! So let's get these started!

Here's what you need for the meat balls

1 egg, lightly beaten
1 can (5 oz) evaporated milk
1 cup quick-cooking oats
1 small onion, chopped
1 teaspoon salt
1-1/2 teaspoons chili powder
1/2 teaspoon garlic powder
1/2 teaspoon black pepper
1 teaspoon dried parsley
1-1/2 lbs ground beef

Preheat your oven to 350 degrees Fahrenheit


Grab a large bowl and combine the egg, evaporated milk, oats, onion, salt, and spices. Pretty much everything but the meat. Mix it all up with a spoon...


Now you're going to take your ground beef and crumble it over the oat mix. I didn't get a picture of this...I forgot. Oops Anyways, you're going to crumble the beef over this and then mix it really well. I use my hands, which is probably why I don't have a picture. Using my hands really allows me work the oat mix with all the spices and onion into the beef to ensure that all the meatballs will have a good mix of flavor.


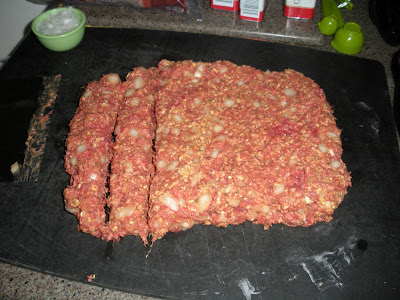
I shaped the meat into a rectangle type form so I could hopefully more evenly divide the meat into even sized meatballs. It...sort of worked. Granted, this was another wine night adventure with my buddy, Jazz, so it got to a point where I was enjoying my wine and trying to do 3 things at once. So of course my meatballs weren't all the same size.


Shape them into 1-inch balls and place them on a greased rack in a shallow baking dish. I have a really cool meatball roasting pan with a floating rack that works perfectly. Only problem is...I need 2 of them when I make meatballs because the rack only holds 15-18 meatballs. You want to not have them squished together so you might need to do this in two batches or use another baking dish like I did. All while trying to make Parmesan Potato Wedges at the same time. It was difficult.


Yeah, they're totally not even at all. But pop them in the oven for about 20 minutes. Check them around 15 to see how they're doing. They're done when they are no longer pink. You may need to cut a meatball open to check, that's what I did. While they're baking it's time to get that barbecue sauce going.

1-1/2 cups ketchup
1-1/8 cups packed brown sugar
1/3 cup chopped onion
1 teaspoon liquid smoke
1/2 teaspoon garlic powder


Combine all the ingredients in a small saucepan and bring to a boil. Once it's boiling reduce the heat and simmer for 2 minutes, stirring the sauce frequently.


Doesn't that look good?!


When the meatballs are done and look like this, you can transfer them to a 13x9 baking dish, or something a little smaller. My original recipe says this makes 4 dozen meatballs...yeah I got closer to around 2 and a half...I made bigger meatballs apparently.


 You have them in your baking dish, now it's time to cover them in that delicious barbecue sauce you made! Oh but we're not done yet...you need to put them back in the oven for another 10-12 minutes...


Yep there they are, baking away. Again my dish is really messy...I blame the wine. Delicious, delicious wine. So once the meatballs bake in the sauce for 10 or 12 minutes you're now ready to eat them!!


Don't those look sooooooo good?! Now I know this isn't a whole meal. I accompanied my barbecue meatballs with Parmesan potato wedges. You can also add a side salad to really make this meal complete. Gotta love the veggies. I've been trying to make more things with vegetables. I hear they're healthy and good for you. Hmmm healthy, who would have thought?

Well anyways, I hope you enjoy these delicious meatballs. I did and Jazz sure liked them too! I'll probably post the Parmesan Potato Wedges sometime soon, maybe tomorrow? 

I'm excited about my birthday, just because hey, it's my birthday, what's not to be excited about?


One last picture! Enjoy!
Thanks for stopping by!
'Til Next Time!!